


Forgot Password?
Please enter your email address to receive a link for resetting your password.
Thank You
You will receive an email with further instructions. Please contact customer support if you need any further assistance.
Please verify your email address
A verification link has been sent to your email to activate your account. The link will be valid for 1 hour.
Please check the spam inbox if you can't find the email. If you still can't find it, we can resend it.
A verification link has been sent to your email 00:00

Pro Tips: Optimize Your Photos for the Best Print Results
 Facebook
 Twitter
 LinkedIn
 Email
Email
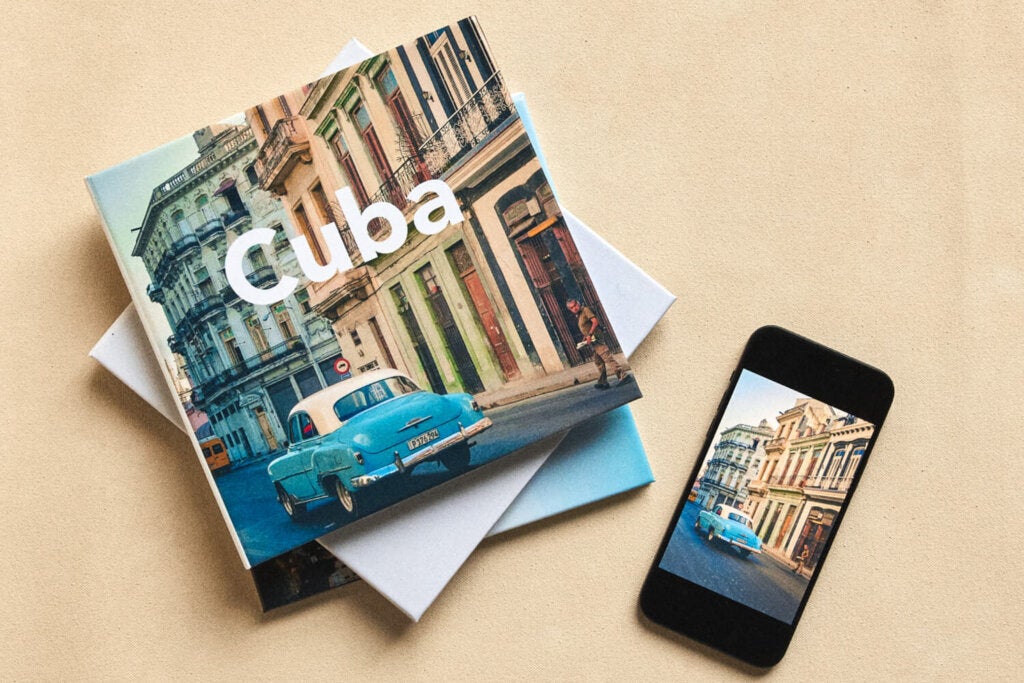
In our digital age, we experience images mainly on screens. We share family memories and our creative photography on social platforms like Instagram, Facebook and Twitter. We can be quick to forget the value, beauty, and significance of printing photos. It’s something tangible.
Ensure your photos look stunning in print with these expert tips and material recommendations. As a pro photographer, your work deserves to shine in every format—especially in print. At Printique, we know that getting the perfect print starts long before the ink hits the paper. From choosing the right materials to optimizing your photos, here are some key tips to ensure that your work looks stunning in every piece you create.
Optimize for Resolution and Color
Make sure your images are set to a resolution of 300 DPI or higher for crisp, clear prints. Check that your color space is set to sRGB, the most widely used profile for vibrant, accurate colors in print.
Choose the Right Paper
Your choice of paper can make all the difference in how your images appear. For bold, saturated colors, our Luster paper offers a beautiful sheen. If you’re looking for a fine art finish, our Giclée papers provide a textured, gallery-quality feel. And for true-to-life detail, our Glossy paper adds that perfect pop of vibrancy.
Consider Your Photo Subject
For portraits and softer imagery, we recommend Matte finishes to bring out subtle tones and textures. For landscapes or images with high contrast, Metallic papers can enhance the depth and vibrancy of your shots, giving them a unique, eye-catching glow.
Test Print for Accuracy
Before committing to a large print run, consider ordering test prints to see how your images translate on different materials. This ensures that colors, contrast, and resolution meet your expectations before finalizing your work.
Craft with Care
We handcraft every Printique product in Brooklyn, so you can trust that your work will be produced with the highest level of care and precision. Choose from fully customizable options to create photo books, albums, and wall art that reflect your unique artistic vision.

In an age where millions of photos are taken every day, it can feel like most of those images quickly vanish into a digital void. This often raises the existential question: does a photograph exist if it’s not printed? While we’ll leave that one to the philosophers, we firmly believe in the power of printed photographs and the value they bring to our lives.
Prints demand a longer look and take images to a place beyond the digital world of endless scrolling and forgotten memories. They are essential to preserving our most cherished family memories. Get started with your perfect print and follow our tips to get the best results with Printique.
Silver Halide Printing from Printique
Although we print from digital files, our standard printing process sticks to photography’s roots with the traditional silver halide process. Similar to what you might remember from your high school or college darkroom, we project your images onto light-sensitive paper and silver-based chemistry. The prints are sharper and the colors and tones are more vibrant. If you’re partial to ink, many of our specialty papers use that process without sacrificing quality. We include those options later in this feature.
Wall Decor Printing Options
Metal prints add sparkle and shine. It’s smooth and reflective like our glossy paper, with extra punch that helps colors jump out and black and white tones shimmer. Metal prints are perfect for black and white, landscape, street photography and Instagram images. You can learn more about this high quality option in our guide to metal photo prints.
Acrylic prints are printed directly on the sheet. Acrylic is more durable and has a longer life than traditional printing methods. These sleek high definition prints and blocks display sharp vibrant colors. They are printed on polished high grade acrylic, and the high gloss effect makes it perfect for images with high tonal range. They’re great for the home, studios and galleries. One inch desk prints make for modern, high quality gifts.
Wood prints can add a new dimension to your work and catch viewers by surprise. Like our other non-traditional surfaces, it’s best to approach wood from a highly selective process. Wood prints work best with landscapes and nature which blend seamlessly into the wood’s surface. Wood can also be great for black and white, but, like nature and landscapes, keep in mind that warmer tones and heavy grain will shine through turning black and white tones into rustic, brown tones.
Canvas prints give your photos a gallery-worthy treatment. Printed on high-quality, heavy weight canvas stretched onto a sturdy, 1½ inch, pine wood frame, these specialty prints come alive for formal family portraits. The painterly quality make them a great option for floral still lives and bucolic nature scenes.
Displaying Printed Photographs
Now that you’ve upped your printing game, it’s time to think about display and framing options. Printique offers a variety of affordable professional quality custom framing options to help your work shine, whether it’s displayed above your couch or in a gallery.
Once you’re through the editing, printing and framing process, the next step is determining how you are going to display your work.
If you’re exhibiting your work in a group show, the gallery is likely working with a curator who has their own vision for how to display your work alongside other talented photographers.
However, if you’re preparing for a solo exhibition or are trying to organize your work in your home, Printique’s Wall Design Wizard can save you a lot of trouble – and math! The best part about our Design Wizard is that it’s free. It’s also a great way to virtually sell multiple prints to collectors by showing them different ways the work might look on a wall or even in their own homes.
How to preserve and care for your prints
Printique prints may be archival, but we highly recommend the following easy steps to preserve and care for them. If you’re framing using Printique frames, you won’t need to do much as we use all archival materials and UV coated glass to protect your images from fading. If you’re storing them in a portfolio book or box, we recommend using acid free materials. Make sure to keep them in a dry (30-40% relative humidity), cool (room temperature or below, but not too cold!), clean, and stable environment. For best results, avoid attics, basements, and other locations with potential leaks and environmental extremes.
After you make your prints, it’s time to start thinking about making a photo book. We’ve got you covered in our epic guide ‘How to Make a Photo Book.’