Forgot Password?
Please enter your email address to receive a link for resetting your password.
Thank You
You will receive an email with further instructions. Please contact customer support if you need any further assistance.
Please verify your email address
A verification link has been sent to your email to activate your account. The link will be valid for 1 hour.
Please check the spam inbox if you can't find the email. If you still can't find it, we can resend it.
A verification link has been sent to your email 00:00

Oh hello fall, my how we’ve missed your cool temperatures and beautiful colors. It’s easy to be so inspired this time of year with Mother Nature’s grand show of changing colors and temperatures. When it comes to fall photography, there are a few tips you will want to keep in mind before hitting the shutter. Here are our 5 tips for Photographing Fall for print.
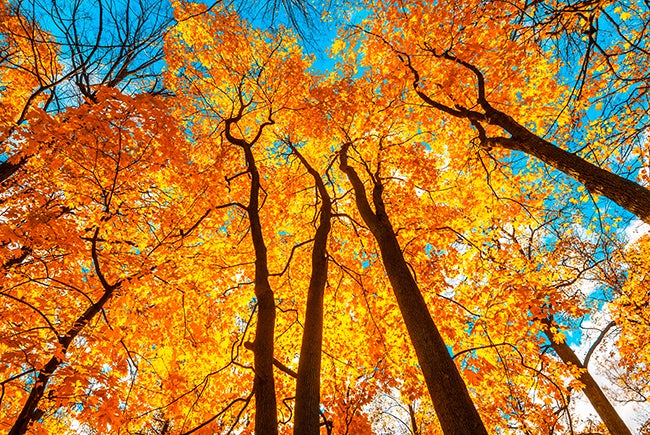
Try tweaking the saturation a bit. You don’t need to go overboard here but a slight bump in both the saturation and contrast will make the image pop. Nature already puts on a fabulous show so a slight bump is more than enough to make your image speak. For those of you that are a little more advanced, you can also change your in-camera settings to give you more vivid colors.
Printmaking Tip: This type of bump in colors render best on metal prints with a white finish and glossy. For photo papers, try the metallic or glossy.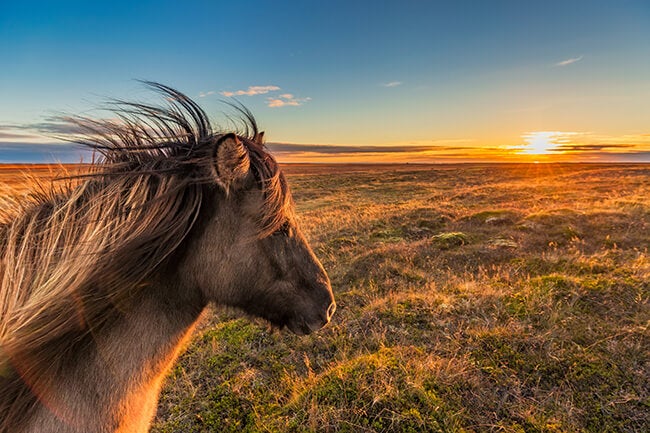
That golden hour is pure magic for a fall photoshoot. What is the golden hour? It’s that hour right before the sun sets in which daylight is softer and redder than any other time during the day. The sun is low in the sky and often spreads the light throughout the horizon creating dramatic shadows with great depth for autumn photography.
Printmaking Tip: The great thing about this type of photo, is that you can either go vibrant or soften it with a classic canvas. It’s versatile.

Oh, that early morning fog is something that is pure magic. It may mean that you need to set your alarm to get the shot, but it’s so worth it. Typically, the thickest fog appears two to four hours i low-lying areas after sunrise. It quickly dissolves just as quickly as it appears. For this type of set up, bring a wide-angle lens to show the vastness of the fog blanketing the landscape.
Printmaking Tip: The fog tends to give the image a softer look, so when thinking of print, think of classic canvas, metal print, white with a satin finish. Also, try any matte type photo papers.
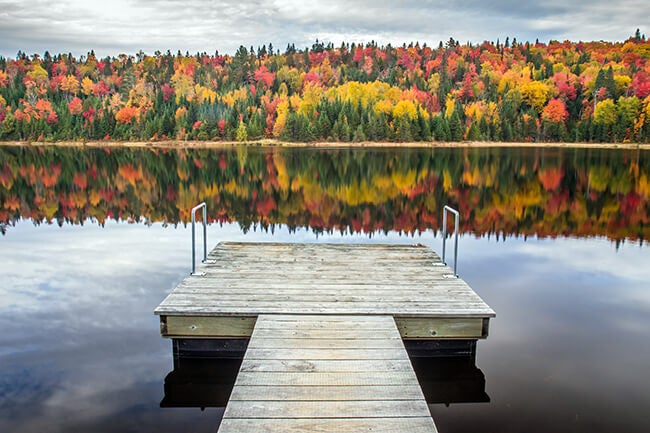
For the sharpest photos for print, try a tripod and a shutter release/remote. Using these two together will cut down on any hand-held blur. Although, blur can be beautiful when it’s intentional when you’re enlarging a print and it’s not planned, it can often ruin your photo. You’ll want the sharpest and cleanest file and that often means lowering your shutter speed and ISO to keep your file sharp.
Printmaking Tip: When using a tripod, you’ll be able to go large with your print. Try the 20×30 standouts or a 20×20 wood print.
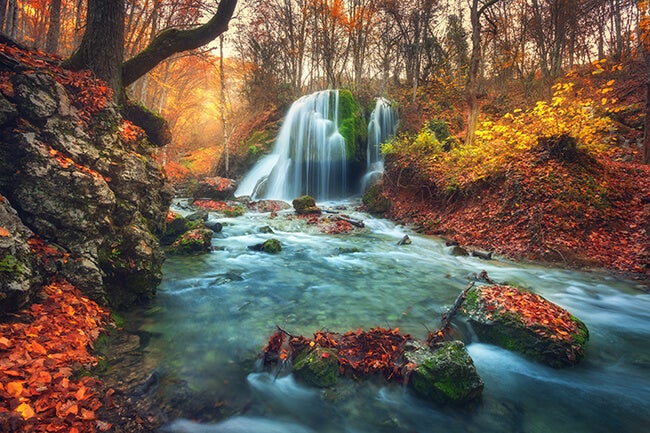
Try capturing some water movement in a waterfall photoshoot and make it the main focal point. You’ll need to bring a tripod and will need to slow your shutter speed. Also, we found this ARTICLE that recommends using a neutral density filter if the light is bright, this way you can keep detail in the waterfall/movement.
Printmaking Tip: Custom Framing the waterfall will give it impact. There will be colors you can pick up for the mat and then choosing a more natural type of wood frame to compliment the trees/nature will enhance the overlook and feel of the print.
If you have a number of different fall photos you would like to print and make a wall gallery, we have the perfect design tool for you. Check out our all-new wall designer. You can pick your room, your walls and furniture. Upload your photos and play interior designer! Ready to start your design for your fall leaves photography? You can start by clicking HERE.


 Facebook
 Twitter
 LinkedIn
 Email
Email