


Forgot Password?
Please enter your email address to receive a link for resetting your password.
Thank You
You will receive an email with further instructions. Please contact customer support if you need any further assistance.
Please verify your email address
A verification link has been sent to your email to activate your account. The link will be valid for 1 hour.
Please check the spam inbox if you can't find the email. If you still can't find it, we can resend it.
A verification link has been sent to your email 00:00

Tuesday’s Tips Getting the Details Just Right
 Facebook
 Twitter
 LinkedIn
 Email
Email
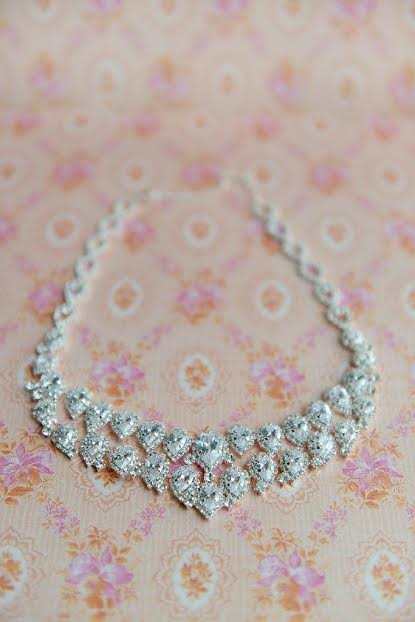
Brides spend months finding the perfect pair of shoes, the drool-worthy jewelery and that special piece to adorn their gorgeously, flawless hair and they are trusting their photographer to capture those perfect details in the style that they have seen in bridal blogs, magazines, and Pinterest.
As a photographer being prepared for your client’s wedding day is essential, that includes being prepared to photograph the details in the best possible conditions. Printique Ambassador, Erin Gilmore of Erin Gilmore Photography, gives us the MacGyver secrets to getting those perfect details.
1.What lens is the perfect lens to use to capture the little details?
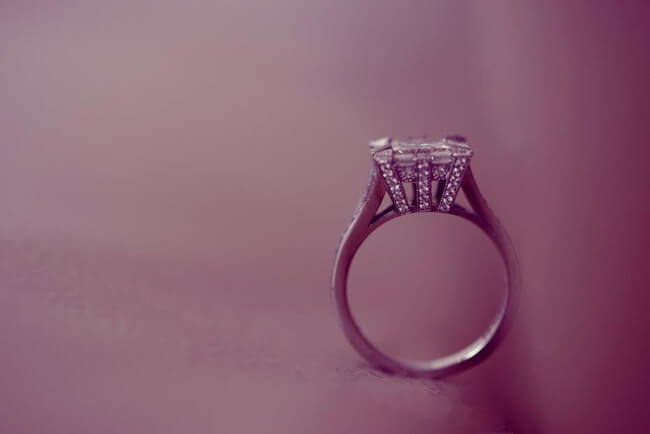
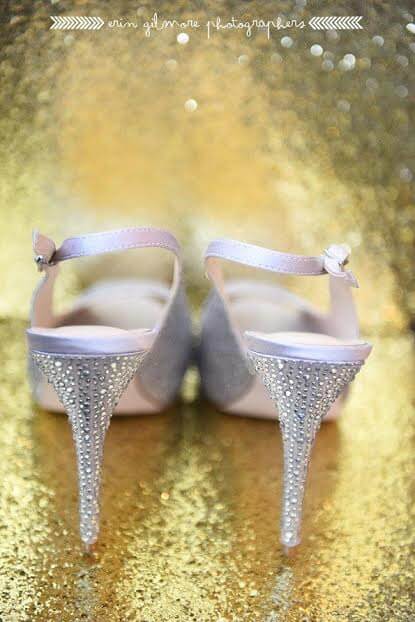
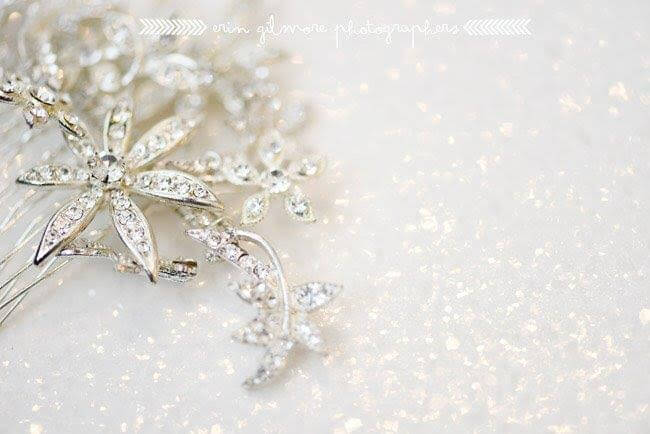
When shooting smaller details such as rings, jewellery, and smaller hair pieces, pull out your macro lens. It will allow you to focus in on the tiniest of details and create some stunning bokeh and gives you great control over depth of field with minimal effort. I am a Nikon shooter so my go to lens is the 105MM macro. For larger items such as shoes I always grab for my 24-70mm lens which gives me a lot more options when shooting. I can zoom in to grab the close up of the cute little bow on the toe or zoom out to get both shoes in frame.

2. Where do you shoot the details?
Location a little or maybe a lot dark? Hunt for a window! Window light is almost always better than flash but just make sure if it’s sunny out to back it up a bit so that those glistening jems don’t blow out on you.
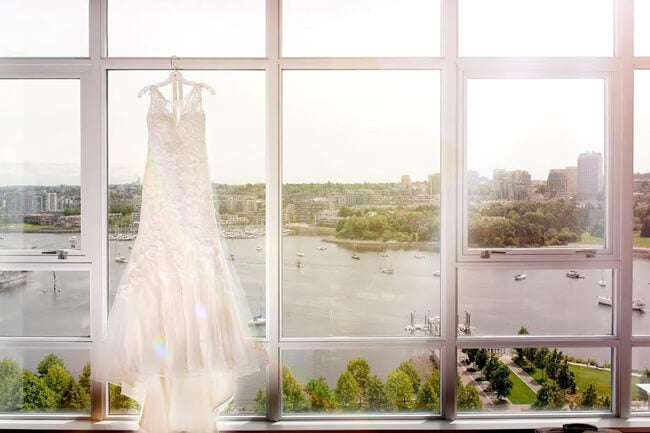
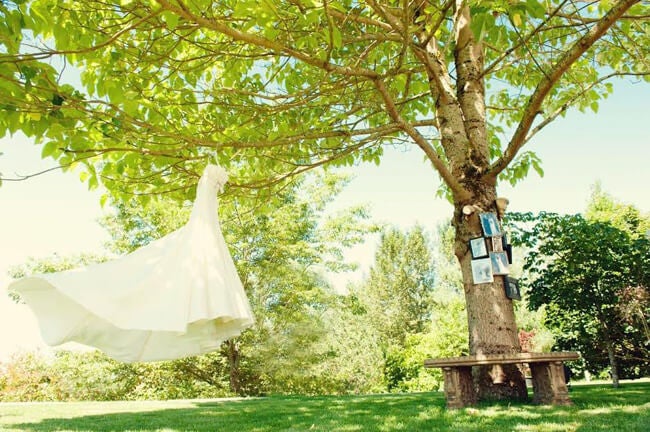
3. The infamous hanging dress shot
You know the one. The big problem is that quite often we arrive on location and the only thing missing is the perfect spot to hang that perfect dress. If you are stuck inside , look for a window where you can clear out any clutter and shoot the dress with backlight.If you are able to get outside with the precious cargo, then a pretty tree with strong branches can be the perfect spot to hang the dress and get some stunning images.
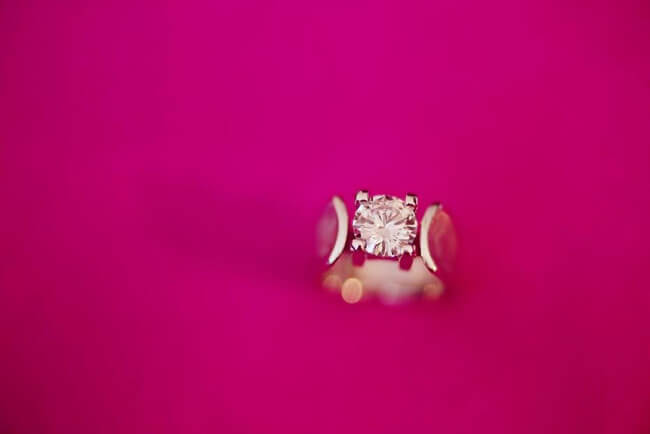
4. How do you get that ring to stand up?
It is pretty rare that that stunning engagement ring will stand on its own and if you are wanting an isolated shot it, you will need something to keep it upright. The answer? Scotch Brand Adhesive Putty. I buy mine in the white colour and always have a package on hand. Just put a small dot on the bottom of the ring and it will likely stand long enough to grab the perfect shot.
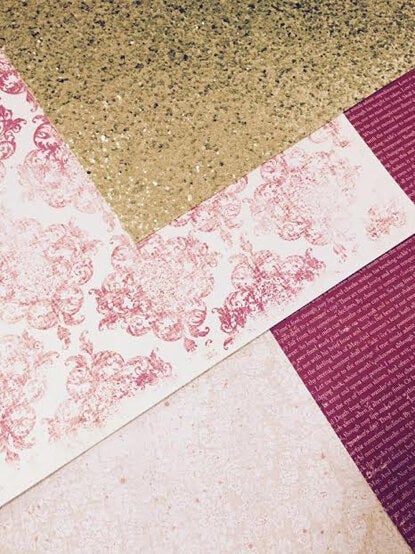
5. What do you use as a backdrop?
Location lacking in great textures or clean backdrops to shoot those details on? This is the most common problem when shooting details and so I come armed with some secret weapons. Your detail shooting best friend? 12×12 scrapbooking papers! Head down to your local craft store and scout out some pretty papers with great colours, awesome patterns, and of course….glitter! I have compiled a rather large collection of papers that come with me to every wedding and just use papers that will flatter the detail that I am shooting. Instant great backdrop! Always remember to purchase at least two of each paper so that when you set up on location, you will have a bottom and a back that matches. You can always use a chair or box to prop up the back paper to keep it upright. Trust me….you will be getting the shots that you always wanted and wonder why no one told you earlier!
MY DETAIL SHOOTING GEAR CHECKLIST
~105mm macro lens
~24-70mm zoom lens
~Scotch Brand Adhesive Putty (in white)
~scrapbooking papers
~handheld reflector
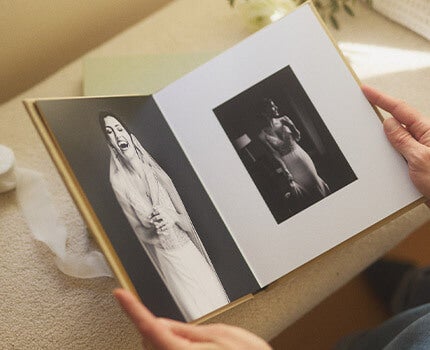
The reason why photographing the details is so important, is that now days most of these detail shots end up playing an important part in your client’s wedding photo book.
Thank you Erin, if you would like to see more of Erin’s work you can head on over to her site at Erin Gilmore Photography.