


Forgot Password?
Please enter your email address to receive a link for resetting your password.
Thank You
You will receive an email with further instructions. Please contact customer support if you need any further assistance.
Please verify your email address
A verification link has been sent to your email to activate your account. The link will be valid for 1 hour.
Please check the spam inbox if you can't find the email. If you still can't find it, we can resend it.
A verification link has been sent to your email 00:00

 Facebook
 Twitter
 LinkedIn
 Email
Email
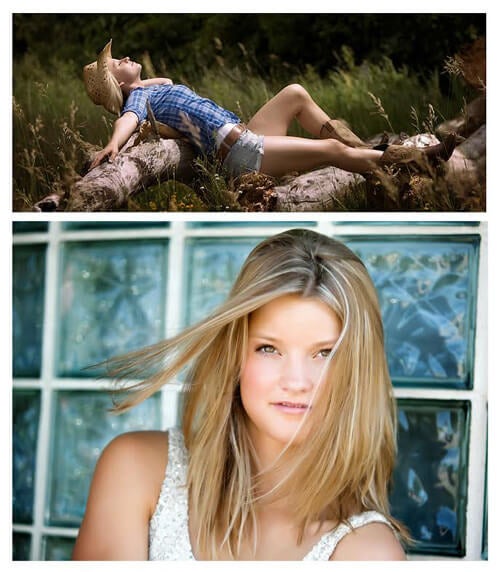
The snow is melting (we promise) and the blooms are starting to appear. Now is the time to start ramping up for portraits outdoors. Before you snap that shutter, there are a few things you should keep in mind when outside. Here are 10 tips from Award Winning, Printique Ambassador, Jen Hillenga.
1. TIME OF DAY
You don’t always get to choose what time of day you are photographing, but if you can, choosing a time of day when the sun is low in the sky is preferable. Early morning and the hour before dusk, called the Golden Hour, will result in the light being softer and more diffused and will make lighting your images a bit easier. When the sun is high in the sky, it creates harsh shadows and your subject’s eyes may not be able to handle the brightness. Photographing at optimal times of the day will eliminate those issues.
2. DIRECTION OF LIGHT
No matter what time of day you are photographing, you will need to find or create a good direction of light. When the sun is high and the light is coming from directly overhead, the light pattern is unflattering to the face, causing dark shadows especially in the eye sockets. To avoid this, you want to find or create what is called ‘Open Shade”. Open shade occurs any time there is shade overhead and light is coming into the face instead of from above it. You can find open shade by tucking your subjects under any overhang, such as a porch stoop, under a shade tree, under a bridge or awning.

3. LIGHT MODIFIERS
If you can’t find open shade, you can use light modifiers to create good light in an otherwise unflattering lighting situation. You can either use a reflector or a flash to change the direction of the main light or to fill in shadows. If you decide to use a reflector, try not to use it below your subject or your fill light may get a “ghoulish” sort of underlight. If you choose to use a flash to light your subjects, you will most often get the best results by using the flash off camera, rather than on your camera. This creates a good direction of light, giving flattering shadows that help sculpt the face rather than flat lighting your subject.

4. DEPTH OF FIELD
When shooting outside, it is often nice to let the background go out of focus by narrowing your depth of field and shooting at a larger aperture. This works great to isolate your subject and really have them stand out from the background. Make sure that if you are shooting more than one person, that you have everybody in the plane of focus so that every person in the photograph is in focus. Your depth of field is relative to your distance from your subject as well, so If you would like to shoot a shallower depth of field, but have more than one subject, try backing away from your subject which will increase your plane of focus.

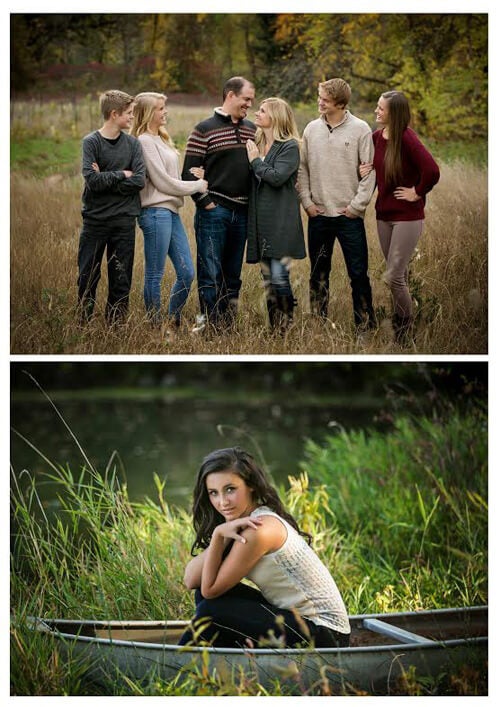
5. UNCOMPLICATED BACKGROUNDS
When you photograph your subjects, it is usually is best to isolate them from the background as much as possible. To do this, try to choose backgrounds that are solid and not busy patterns or patchy lighting that will distract from viewing the main subject.

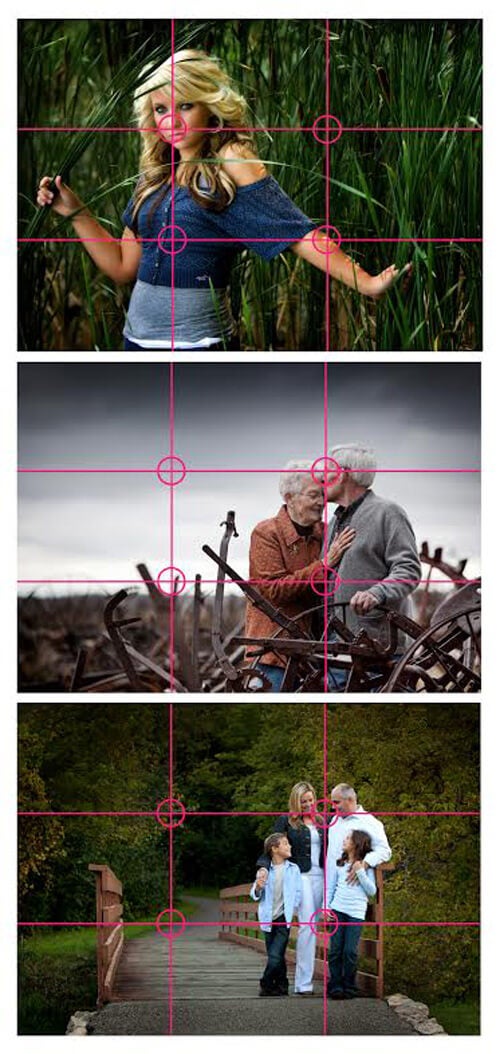
6. COMPOSITION
Every choice we make in composing your images makes a statement. Although centered composition can be very stable and give an impression of strength, off center composition creates fluidity and movement and can often be more appealing. Often you will hear good composition referred to as the “rule of thirds”. Imagine a tic tac toe board dividing your image into 3rds. Where these lines intersect is called the “third” as if often the best place to put your point of interest with the most effective being the lower right third because we read in the z formation, meaning left to right, top to bottom. This means that the lower right corner of the image is where our eye naturally stops, creating the best rest stop and point of interest.
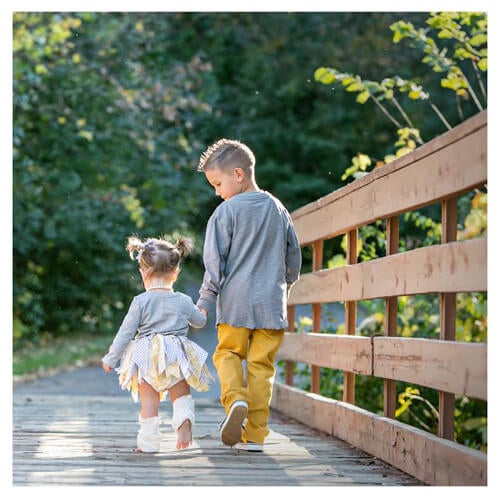
7. LEADING LINES
To create interest and movement in your image, you may want to use natural or architectural leading lines that draw the viewer’s eye to the subject.

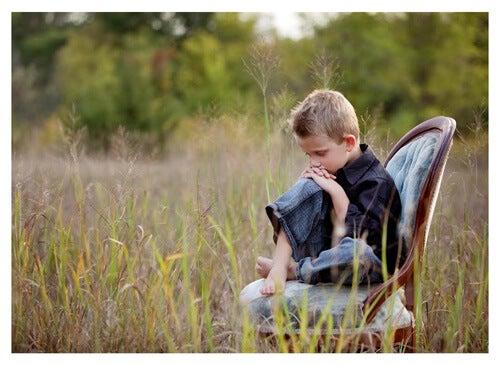
8. GET LOW…OR HIGH
Changing up your camera position can create interest in your portraits, especially when photographing children. getting down on their level can often show how the world looks to them and give you a little glimpse into their world as well as allowing them to look straight into the camera. Shooting small things from a high angle can make them looks small, creating a sense of wonder. When photographing, walk around your subjects and play with different angles to find what works with your subject and step out of your box a little.
9. BACKLIGHTING
If you can’t find shade, try a few shots with the light behind your subject, creating a beautiful glow behind them. Don’t forget to expose for your subjects face though or you may end up with dark underexposed faces. Sometimes, if you hit the right angle you may also have the light hitting the lens, causing what is called “sun flare”. Sunflare can be cool if done correctly and sparingly.
10. IF YOU CAN’T BEAT IT, USE IT!
Sometimes it’s just not possible to get the perfect lighting in certain areas…but it is usually possible to get a great image anyway. Sometimes its raining…grab and umbrella and have your subject jump in the puddles. Sometimes its too sunny…try facing your subject into the sun or doing an image that is more of an art piece than a portrait in order to use the whole scene. Sometimes its is too windy…. to do an image of the hair flying wildly in their face. Be creative with your surrounding and don’t be afraid to play. You will often find that you can turn a negative into a positive and still get a great image.
Thank you, Jen! Want to learn more about photographing outside? Check out this BLOG POST about the golden hour!