


Forgot Password?
Please enter your email address to receive a link for resetting your password.
Thank You
You will receive an email with further instructions. Please contact customer support if you need any further assistance.
Please verify your email address
A verification link has been sent to your email to activate your account. The link will be valid for 1 hour.
Please check the spam inbox if you can't find the email. If you still can't find it, we can resend it.
A verification link has been sent to your email 00:00

 Facebook
 Twitter
 LinkedIn
 Email
Email
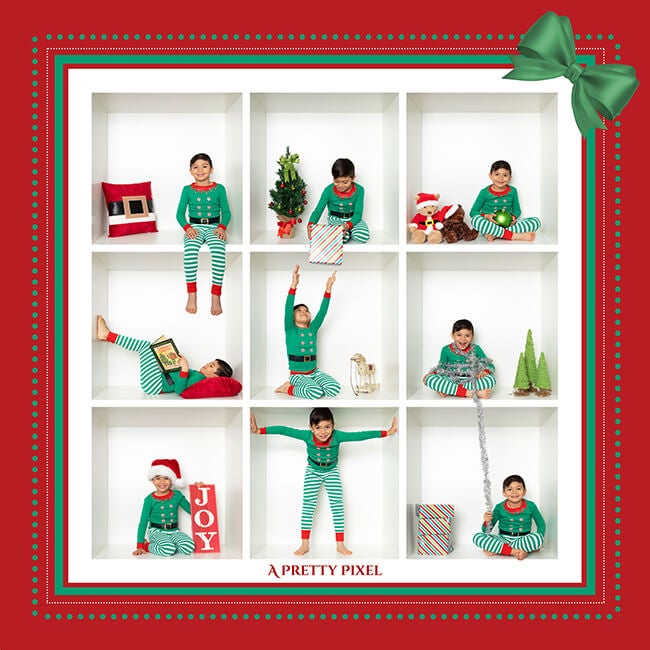
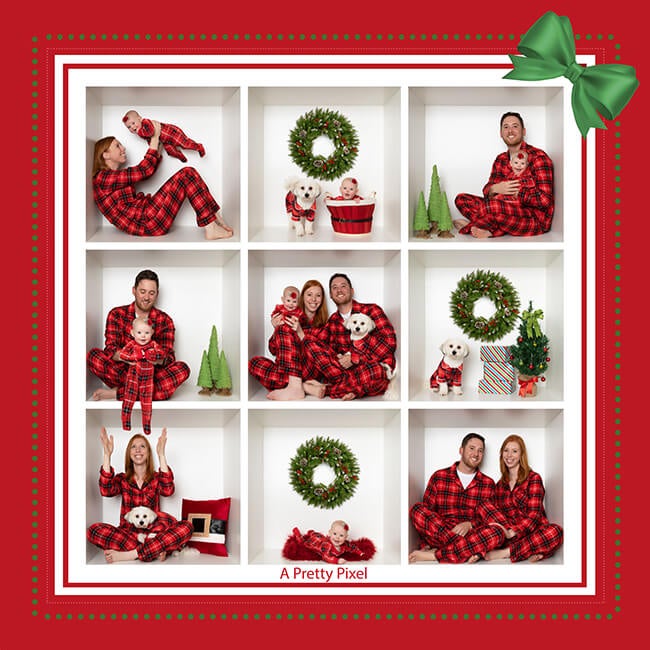
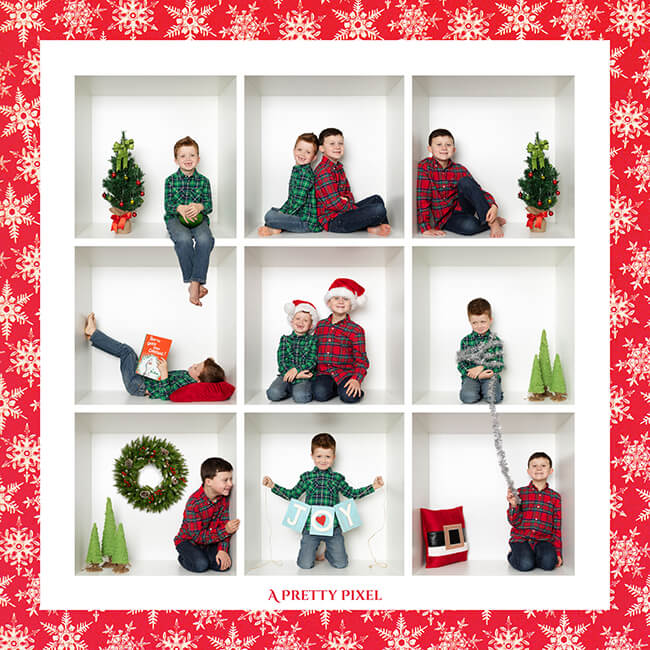
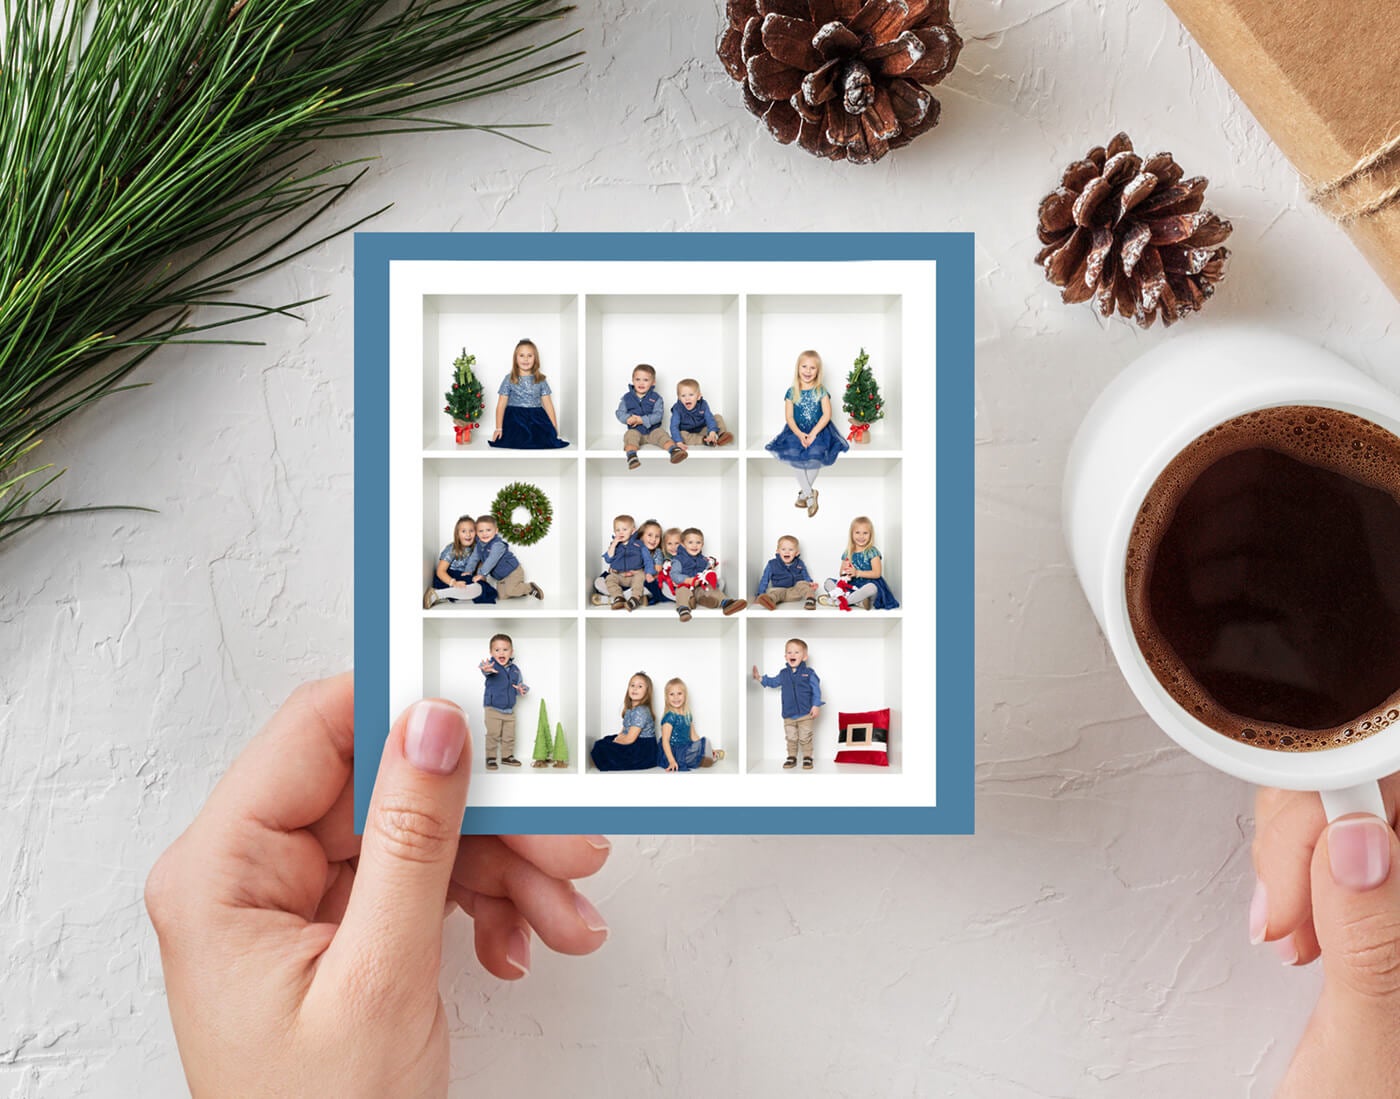
It’s not often you’ll hear this, but go ahead and think INSIDE the box for your next portrait session! What on earth does that mean? Well, it’s the new trend that is sweeping the photography industry. We sit down with Photographer Terry Geerdts of A Pretty Pixel who shares with us her popular holiday portrait box sessions.
1. Build the Box
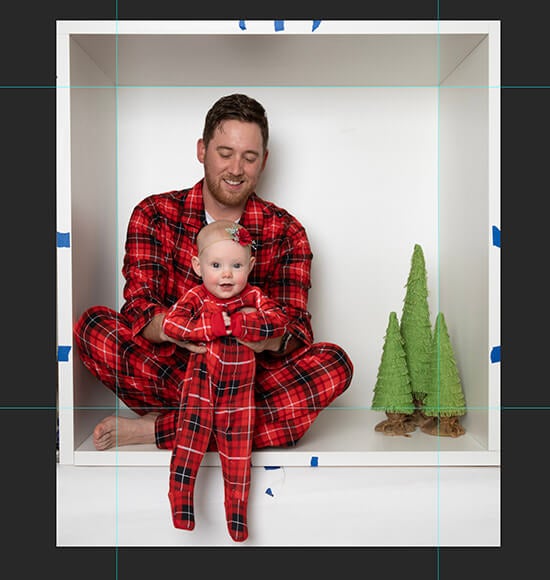
You have different options for putting together a box. You can buy wood at your local home improvement center to make it. I went to Ikea and bought ready made table tops (LINNMON). This made it easier as no painting or sanding is needed. I bought the smaller tops so I have a smaller box- my tops are 39 3/8″ x 23 5/8″. Some people prefer larger boxes that are 4 ft square and 3 feet deep to fit more people. Just make sure you put the box together so that it is an exact square as that matters for post processing. I used “L” brackets to assemble it so that it can be taken apart but you can use screws or nails as well. You need to get thin wood or something similar for the back wall of the box too. I found a 4’x8′ sheet at Home Depot which was already painted white and not shiny. Please remember if painting your box not to use glossy paint. These days people are even using cardboard boxes for these sessions, not quite as professional looking but fun too. Next, you will need to make a base for it. This is so that someone can have their legs hanging over in front. The base should be tall enough for someones legs to hang over without touching the ground. The base should be white in the front to be able to easily cut out for the composites. Another tip when setting up the box is to use tape in spots on the frame so you know where to line up things you are “passing” from image to image.(see my photo- it shows blue painters tape).
2. Photography
Now to the photography end of things. The camera must be mounted on a tripod and kept at the same focal length, aperture and height throughout each session. It is best to have the camera in portrait position. It works well around 30-50mm .. any wider and you might have some distortion. At different focal distances you will have more or less depth to the look of the box. Longer focal length means narrower looking sides to the box. The camera should be exactly at the center of the box when shootin so that the top and bottom and sides all look equal. Its important to try to shoot it as straight as possible. I photograph from about 6-10 feet away from the box. I use manual focus when photographing these. I set it before the session on something I put in the box and then leave it for the session. If you shoot at around 8-11 aperture everything from the front to the back of the box should be in focus. Directly behind me, I use one strobe (alien bee) slightly above my head and I use an octagonal softbox. You can also use an umbrella. One light works best, two lights create more shadows.
3. Post Production
You can either buy or create the templates you need for the box. You can find templates for sale on Etsy (try searching photoshop templates for box composites). I made my own templates which do take time. I first do several adjustments in Lightroom. I adjust the color and light (make sure you sync all the same settings to all images being used together)and I straighten if needed and crop in as much as I can too. Then I choose all the ones Im going to use in one template and go to Photo- Edit in-Open as layers in Photoshop. This way they are all there ready to go. Then I open my template and drag in each layer to the right spot placing in in the proper layer order. For the PS work you need to be comfortable working with layers as it gets tricky knowing what is above and below each layer. You will need to use layer masks to hide and show whatever parts will be sticking over the sides. Its challenging yet fun figuring it out. Its also essential to know how to transform using warp to line up the edges(the corners should line up with the template corners). One good thing to do is use guides(blue lines) to keep all of your lines straight(see my sample image). You can turn on rulers to help line up as well. After a while you can get them done pretty quickly but yes these sessions are a bit more work than a traditional session. You can search youtube for help on doing these(try searching editing box composites). There is even a facebook group you can join where you can share, learn and be inspired called “In the Box” Education.
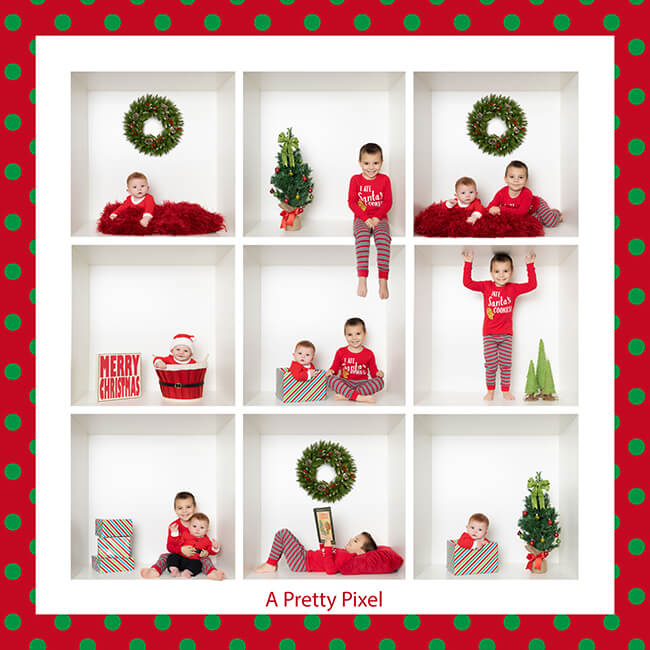
The sessions were a hit with my clients and I found it fun doing something different from the same old sessions. You can either let your client pick their favorites for the box or you can do all of the deciding yourself. You can offer different amounts of boxes. I did either a 4 up square or a 9 up square for mine. They are great for holiday cards. You can do these box sessions for more than just holidays. Birthdays are fun in the box, one year sessions or cake smashes can be done in there, other holidays, bAdoramaack to school, sports themes, even Halloween.
Thank you Terry for this amazing tutorial. Printique offers square flat and folded holiday cards. They come in four different paper choices including Royal Matte, Royal Felt, Classic Linen and Pearlized White. Ready to start your cards? Click HERE.