Forgot Password?
Please enter your email address to receive a link for resetting your password.
Thank You
You will receive an email with further instructions. Please contact customer support if you need any further assistance.
Please verify your email address
A verification link has been sent to your email to activate your account. The link will be valid for 1 hour.
Please check the spam inbox if you can't find the email. If you still can't find it, we can resend it.
A verification link has been sent to your email 00:00


Dave Wilson/flickr
Photoshop isn’t just for the pros — learning a few, simple techniques can take your photos to the next level.
Despite our best efforts, photos rarely turn out the way we’d like them to. Maybe the lighting was just a bit off or you got photo-bombed by that weird guy from work; either way, some degree of editing is usually necessary to get the results you want.
While there are a lot of photo editing platforms out there, Photoshop is probably your best choice in terms of power, quality, and ease-of-use. With just a few mouse clicks you can enhance subjects, remove imperfections, and correct colors, making your low-resolution photos look like they were taken with an expensive DSLR.
Initially, Photoshop might seem a little intimidating; there are enough buttons, toolbars, and tabs to thoroughly overwhelm even the most tech-savvy among us. Luckily there are only two places you really need to focus your attention when getting started: the palette bar and the basic toolbar.
All your necessary tools and functions live here, so ignore all those confusing tabs and sub-menus and get right down to business. You’ll soon find that Photoshop’s bark is far worse than its bite.
That said, you still might run into a few technical problems. Let’s run through these classic issues, as well as some handy solutions.

Jes/flickr
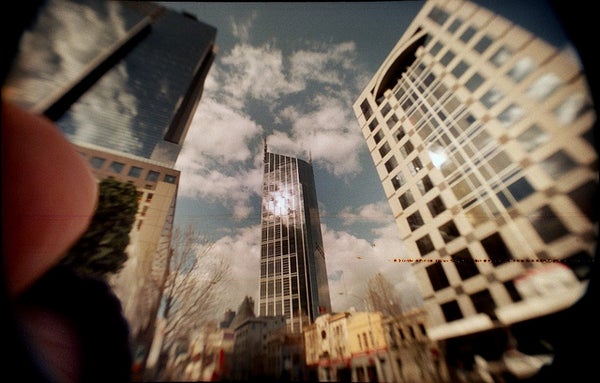
Many photographers use lens distortion intentionally to alter their images, thereby heightening a desired effect or emotion, as Digital Photography School explains. But for those of us who don’t want overly-artsy, mind-bending photos of our grandmother’s birthday party, it can be a real problem.
The good news is that Photoshop makes fixing lens distortion a snap. Simply click the crop tool in your basic toolbar, then make sure both the grid and perspective is selected at the top of your screen.
Next, drag the crop overlay across the entire photo and you’re ready to go. Now, all you have to do is match the distorted image lines to the lines of the grid, and voila! Your photo looks like real life again instead of a 1960s psychedelic rock album cover.

ClaraDon/flickr
Skin imperfections are a common problem, especially in portrait photography. The spot healing brush is your new best friend when it comes to removing blemishes and color correction; it’s the easiest way to make sure your photos — and your subjects — are always looking their best.
Begin by creating a new layer in your palette toolbar, which will preserve and protect your original image (just in case). Then select the spot healing brush in your basic toolbar, and make sure both “sample all layers” and “content aware” are selected.
Now you’re ready to retouch your image. Simply select the areas to be fixed with the spot healing brush. The tool will automatically replace the unwanted region with a closely matching texture from the area around it, and none will be the wiser.

Graham Richardson/flickr
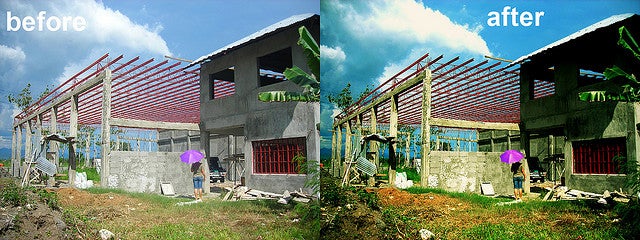
Nowadays, nearly everyone has a smartphone, meaning there are more cameras in the world than ever before. And while this ubiquitous technology certainly makes it easy for us all to point-and-shoot, the quality of these photos often leaves much to be desired, especially when it comes to color, according to Hongkiat.
To enhance colors in Photoshop, start by creating a new layer in your palette bar and selecting the gradient tool. You’ll then be asked to choose one of the many color filters to create the look you want.
Next, drag the filter from the middle of your photo to the corner, expanding the gradient to fill the whole page. Click on the layers panel and choose the “color” blending mode. Experiment with the opacity value until you achieve the desired effect.
Now that you’ve spent all this time editing your photos and making them beautiful, you should ask yourself an important question: are you going to insult your stunning images by opting for some low-quality prints from the local One-Hour Photo, or do them the justice they deserve by investing in a professional-quality product, courtesy of Printique?
This one’s a no-brainer; Printique offers a wide range of beautiful, high-resolution products, including printing options for canvas, acrylic, and even metal. Their dedicated experts will also clear up any issues you weren’t able to resolve in Photoshop during their white-glove inspections, so you can be sure all of your photos will look their best in the end.