The weather has been all of over the map recently with snow and rain storms. While some of us hunker down and wait it out, others head out and capture it. I recently discovered an Printique member who is a storm chaser photographer. I was intrigued to find out more about this type of photography and the preparations involved. Here is our interview with Jeremy Bower of JRB Storm Photography.
How did you get started in storm photography?
My interest in storms started while growing up in New Philadelphia, OH. In June 1986, my hometown was rocked by a rough storm and due to that event, I was actually scared to death of storms. Sometime in the early 1990’s, my curiosity of severe weather began to offset the fear and I began running outside anytime the skies would darken with billowing cumulonimbus clouds. My first experience with storm photography was attempting to photograph storms and lightning with my grandfather’s old Polaroid One Step AF System camera. One could only imagine the severe weather images from that device! As camera technology evolved, I purchased a Sony DSC-P30 in January 2002 and started getting into digital photography. In December 2007, I purchased my first DSLR, a Canon Rebel XTi, after years of primarily focusing on videoing severe storms. It is safe to assume that I’ve had a tad more success in the digital era than I did with grandpa’s Polaroid.
How do you prepare for storm photography?
Planning for a storm photography shoot will start days in advance of a potential severe weather setup. Analysis of upper air and surface data, forecast models, and other types of weather data are looked over to forecast the area where severe weather is most likely to occur. I forecast where supercell thunderstorms will likely develop and where I will be able to view and photograph them from a safe distance. A good portion of storm photography/storm chasing involves plenty of patience and waiting. In terms of preparing the photography gear, the night before departing for a chase I ensure that all camera batteries (including extra batteries) are fully charged.
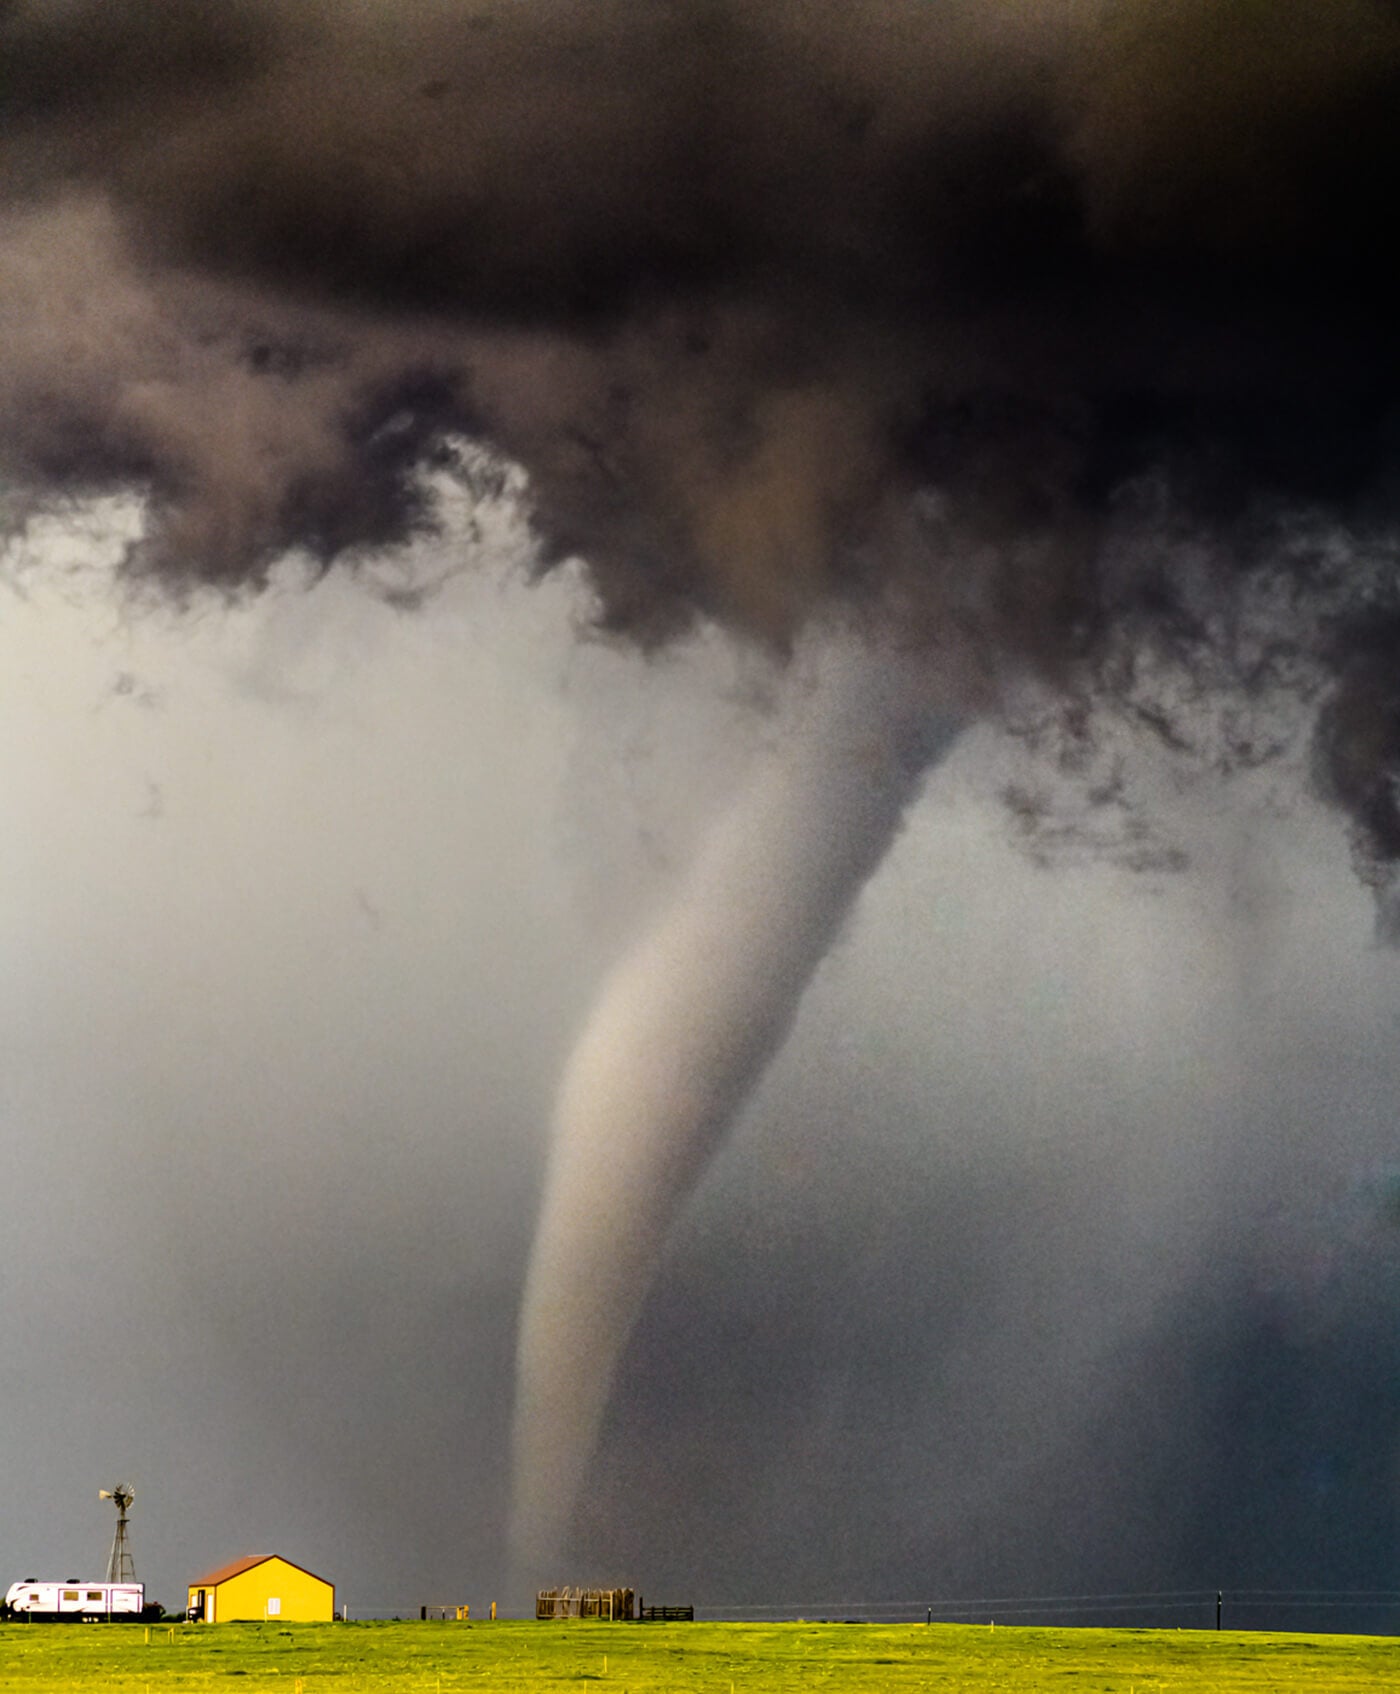
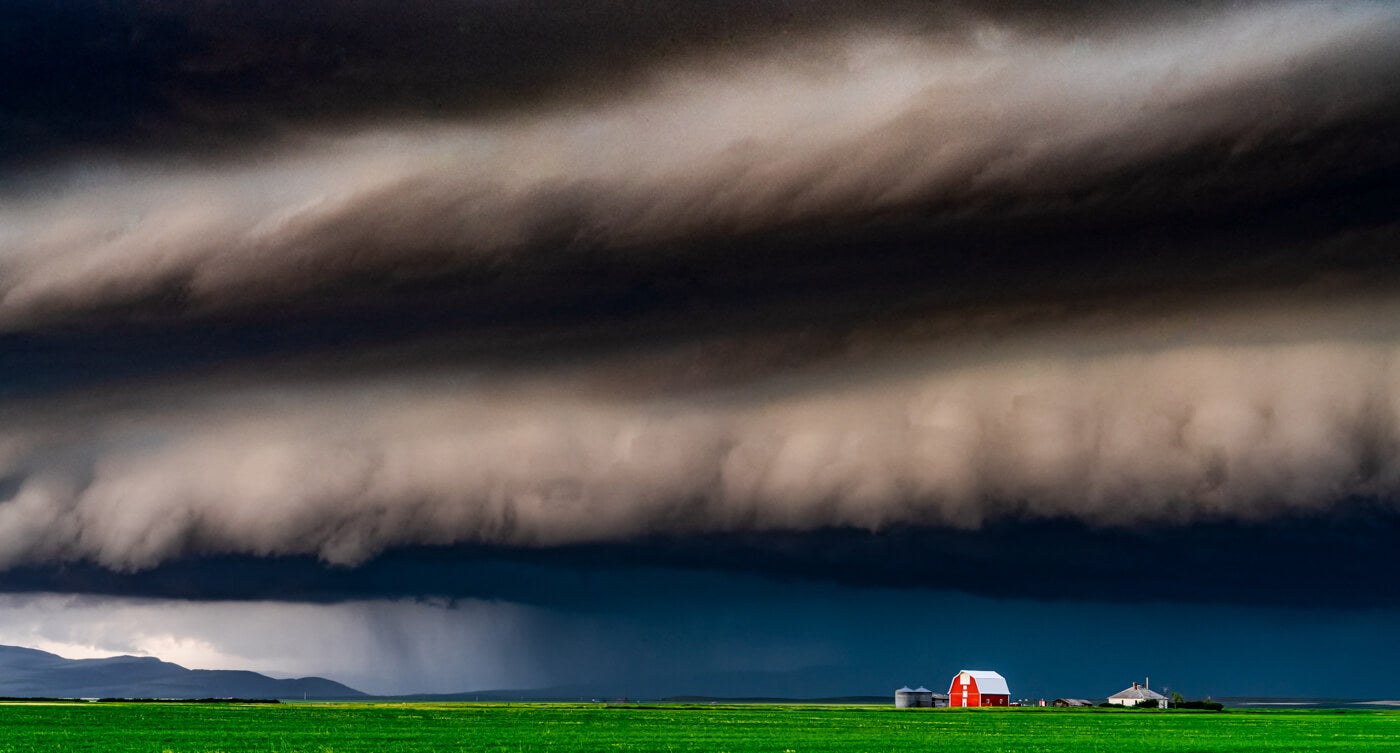
( July 5, 2014, near Bismarck, ND. Taken with a Canon 5D Mark II and EF 24-105mm f/4L IS USM. 1/40 sec., f/4.5, ISO 250 at 24mm.)
What precautions do you take?
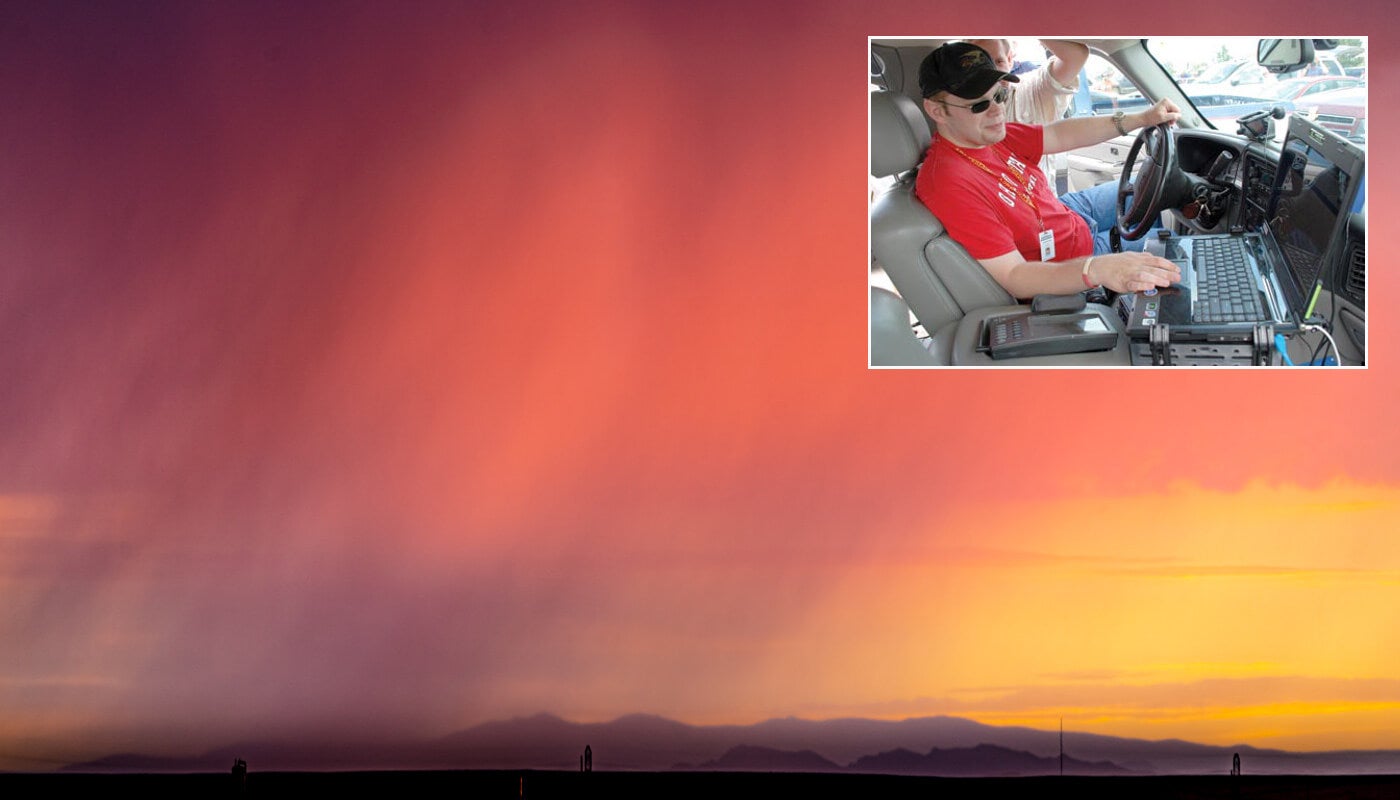
Storm photography can be dangerous if an individual doesn’t understand the basics of thunderstorms and fails to adhere to some general precautions. A storm environment can be a rapidly changing environment and it is imperative to be aware of your surroundings. It is helpful to have someone with you – my wife and I chase together. She can focus on the driving while I monitor radar, the sky, and take pictures. I avoid chasing in cities if possible. When pulling off the road to view a storm or take photos, we ensure that we are completely off the road with the hazard lights on. If possible, we prefer to find secondary roads which might have less traffic. Lightning is always a concern no matter the severity of thestorm. The majority of the lightning photography is done with a wireless trigger so I can remain in the vehicle. Finally, always have an escape route in mind every time you stop to assess the stormor snap a photo — at times you need to get out of dodge at a moment’s notice!
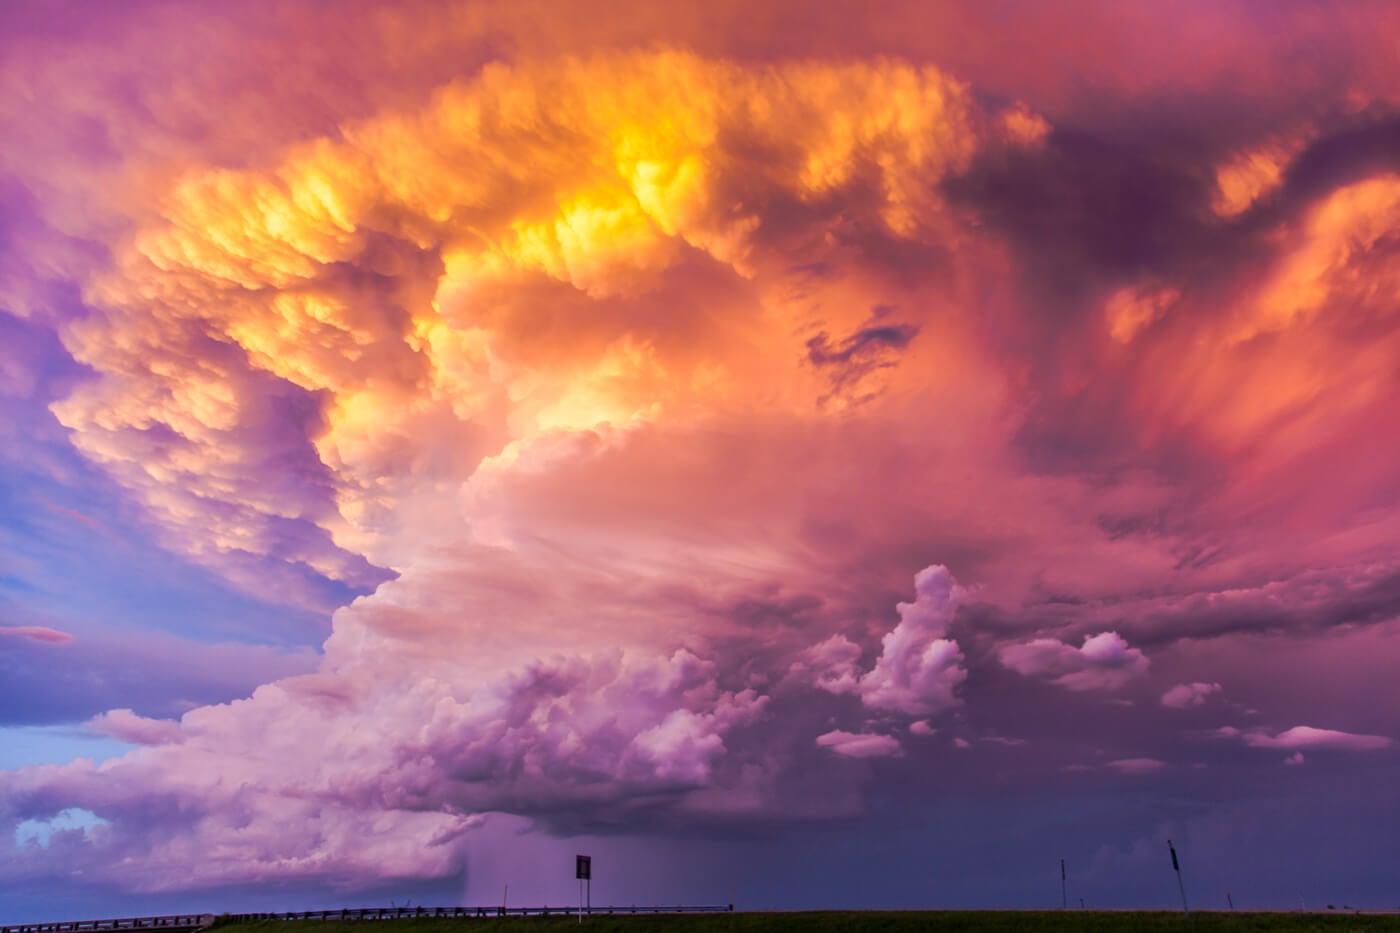
( June 27, 2019 near Hobson, MT Settings: Sony A7rII with Sony FE 24-240mm f/3.5-6.3 OSS, 1/10 sec., f/10, ISO 160)
Explain a typical storm photography chase and photoshoot.
A typical day will begin early in the morning viewing the latest weather data to define a target area for storms. We’ll usually depart home/hotel anywhere between 6 a.m. and 11 a.m. – the departure time is dictated by what state we are headed to. It is very common for that target area to be refined while we are on the road and getting the latest weather information and watching the skies. For the most part, storm initiation will take place between late afternoon and early evening. so lunch is the biggest meal of the day. Once we have arrived at the target area, we watch the skies for development. At times, we could be waiting for hours for clouds, so we often set up camp chairs and relax. Once the clouds start developing, the cameras are set up and ready to capture the shots. We frequently change location once storms are in the vicinity, so it is important to be ready to grab the gear and get back in the car quickly. Storm and lightning photography could continue well into the night or into the next morning — especially if there is a good lightning show.
( June 25, 2019 near Hulett, WY Settings: Sony A7rII with Sony FE 24-240mm f/3.5-6.3 OSS, 1/125 sec., f/7.1, ISO 640)
What’s in your bag?
I have two primary camera bags: ThinkTank Retrospective 30 and ThinkTank Retrospective 7. My Canon 5D Mark II and the EF 17-40mm f/4L lens, EF 24-105mm f/4L IS lens, and EF 70-200mm f/2.8 IS II lens are always in my camera bag as they are my primary lenses I shoot with. I will also have my BlackRapid RS-Sport for shouldering the equipment comfortably. For extreme low light shots, I will use either a 50mm f/1.8 lens on the 5D Mark II or use the quite versatile Sony RX100 Mark III. I also have a Canon T5i and EF-S 18-135mm IS STM lens in the bag to use primarily for videoing our endeavors. Also in my bag, Sony A7rII, Sony FE 24-240 f/3.5-6.3 OSS, Sony FE 55mm f/1.8 ZA, Sigma MC-11, Canon 24mm f/1.4L USM, Canon 70-200mm f/2.8 IS II USM, Sony RX100 V. The Sony mirrorless system really makes it easy to travel to remote locations and capture high quality images.I now utilize a Thinktank Mirrorless Mover 25 to carry the mirrorless gear. I still utilize the other bags for the Canon lenses that I’ve kept. Finally, I have my wireless shutter trigger for lightning photography. An essential item to carry alongside the bag is a heavy duty tripod for each DSLR.
(May 27, 2018 about 25 miles NW of Cheyenne, WYvSettings: Sony A7rII with Sony FE 24-240mm f/3.5-6.3 OSS, 1/200 sec., f/6.3, ISO 800)
Favorite image?
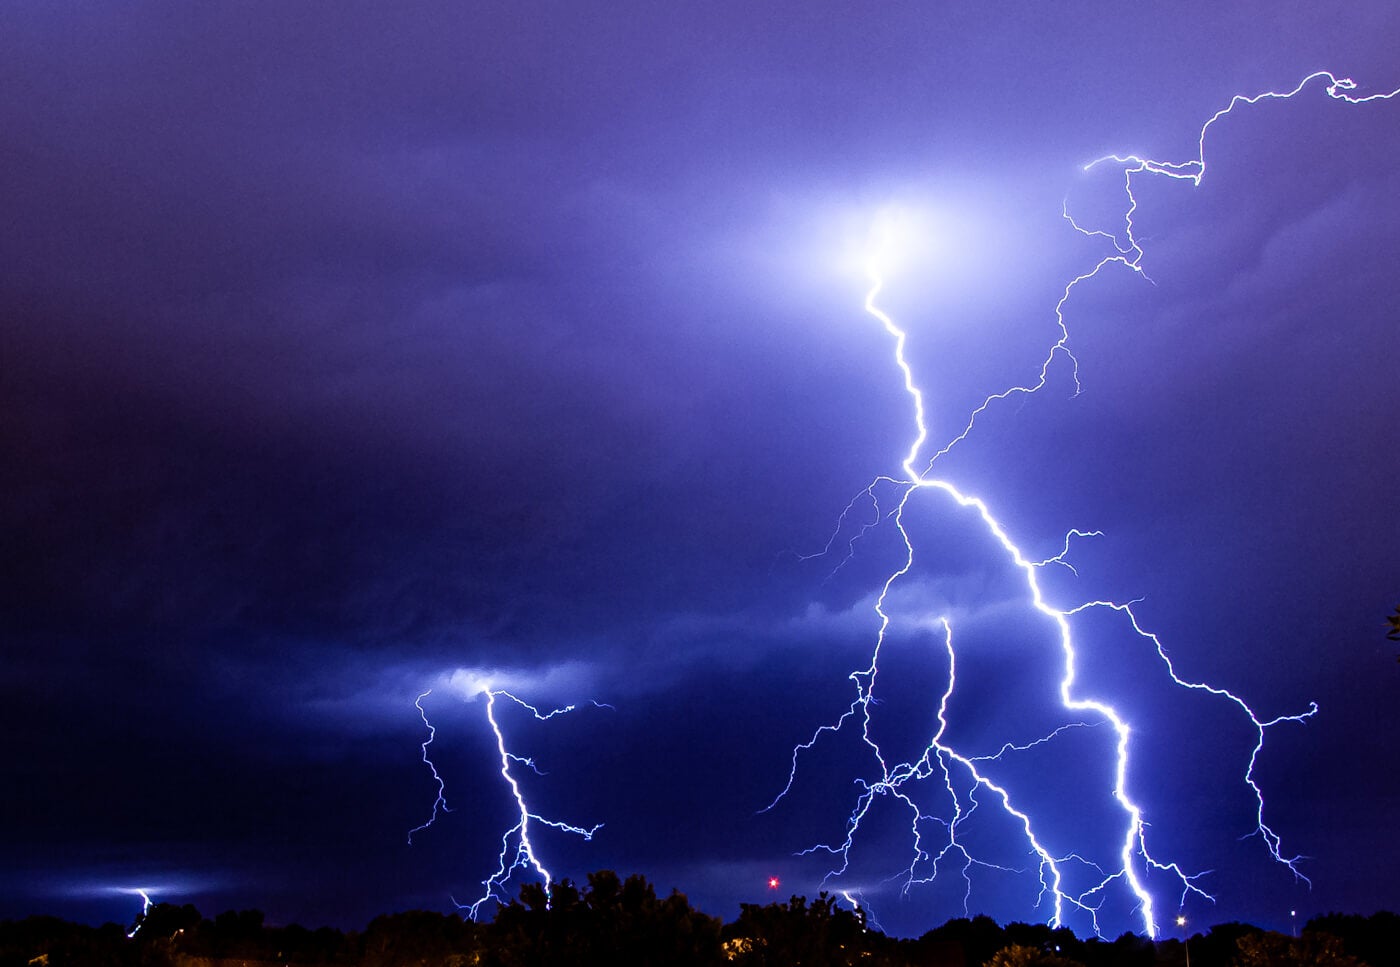
Image info: June 27, 2011, in Lincoln, NE. 1:32 a.m. from my apartment balcony. Taken with a Canon XS and EF-S 10-22mm. 24-second exposure, f/8.0, ISO 200 at 14mm. Story: Anytime I’ve given a presentation on weather photography, I always use this image to advocate patience and to reinforce the idea of always having your camera ready! I was up late that morning and saw a flash outside. I checked the weather radar and noticed a thunderstorm was developing just to the west of Lincoln. I grabbed my camera and tripod and set it up on the balcony. I set the external trigger to open the shutter and I stepped back inside. Within a few seconds, there was a loud crack of thunder that lasted about 20 seconds. I stepped back out on the balcony and closed the shutter and I was shocked to see what I had captured. This image is my favorite because it was the first awesome, crisp lightning that I was able to capture, and it was completely unanticipated.
(June 27, 2011 in Lincoln, NE Settings: Canon XS with Canon EF-S 10-22mm f/3.5-4.5 USM, 24 second exposure, f/8.0, ISO 200)
Any advice for young photographers thinking of getting into this type of photography?
I have always emphasized safety, education, and responsible conduct when it comes to storm photography. For someone who is interested in pursuing this type of photography, I would highly encourage not going alone – if possible have someone with you that has experience in meteorology or storm chasing. If you don’t have experience in meteorology or forecasting, or very little, I would recommend attending a local storm spotter training class organized by your area’s National Weather Service office. It is crucial to keep in mind that environments are constantly changing and it is necessary to know that your safety is your responsibility. Photographing is a learning process – from forecasting where will occur to understanding how to utilize your camera gear to get the best photo. Keep safety in mind always, and just have fun with it.
(June 28, 2019 near Judith Gap, MT Settings: Sony A7rII with Sony FE 16-35mm f/2.8 GM, 1/60 sec., f/8.0, ISO 1600)
Thank you Jeremy. Jeremy prints his artwork through Printique. He prefers the white, glossy metal prints to showcase his photography.
If you would like to see more of Jeremy’s work you can check out his FACEBOOK page, his Flickr page, or you can follow him on Twitter or Instagram both @jrbstorm. He also has a YouTube channel JRBStorm where you can see videos of him giving presentations and following some storms.


 Facebook
 Twitter
 LinkedIn
 Email
Email
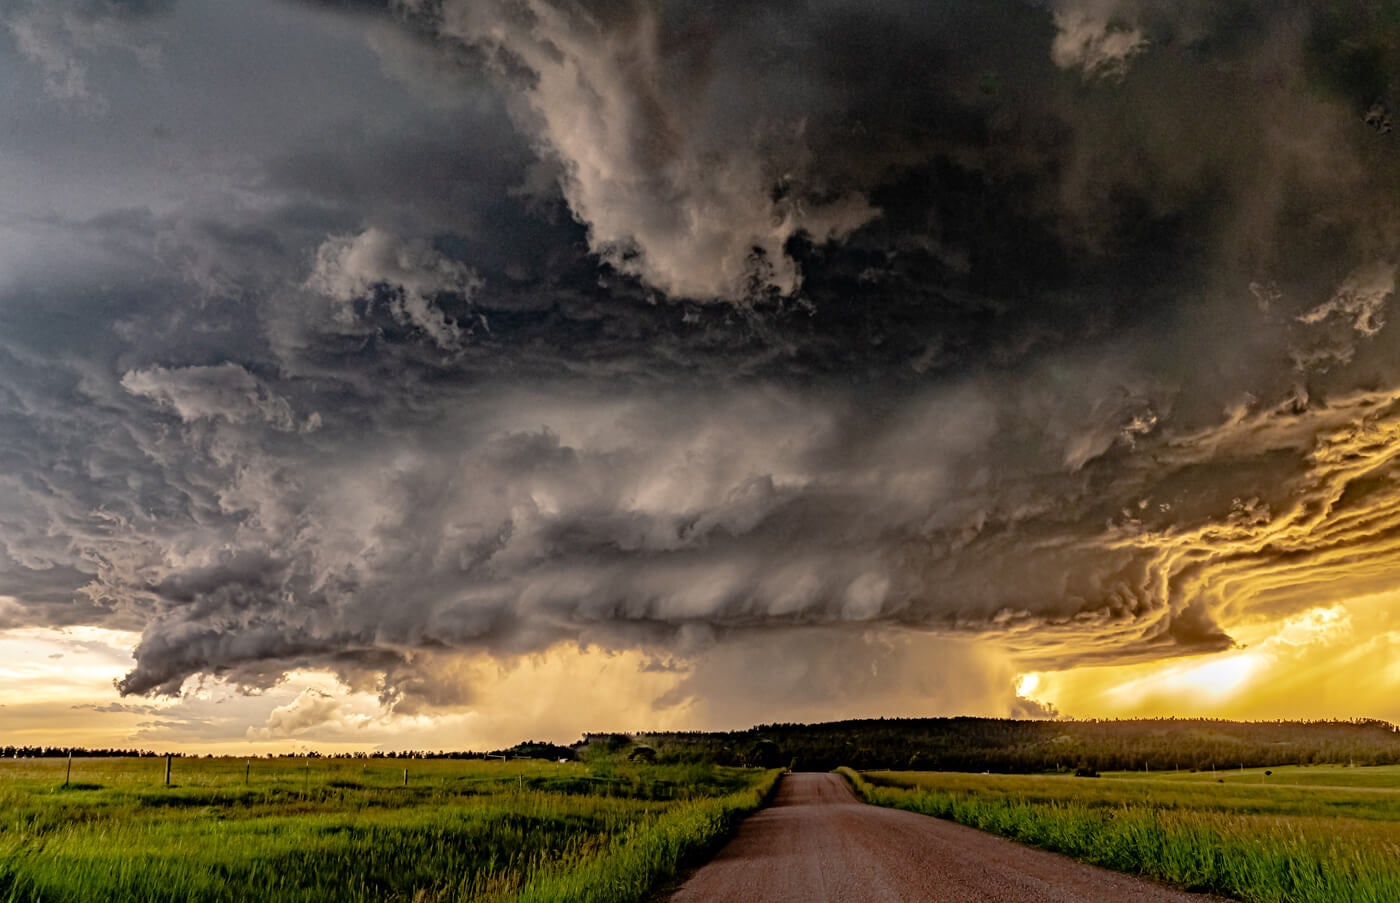 ( June 25, 2019 near Hulett, WY Settings: Sony A7rII with Sony FE 24-240mm f/3.5-6.3 OSS, 1/125 sec., f/7.1, ISO 640)