0
Imagine this: you have the perfect vacation photo on your phone and you want to turn it into a 30×40 print to display in your home; but the Printique uploader says it’s too small! So you settle for a smaller size and plan to take higher-resolution images next year.
Well, the days of settling are over! Here’s how you can enlarge photos for print – with tips from the experts!
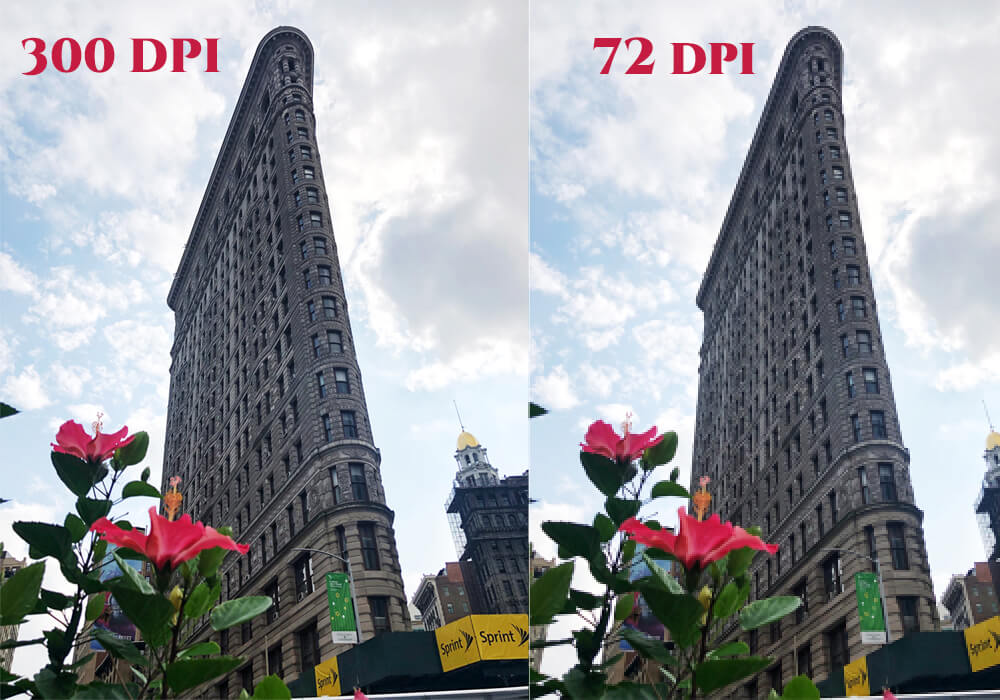
We’re not going to load you down with math, but you will need to know your DPI/PPI. (dots per inch/pixels per inch) The lower the dots or pixels in your photo, the smaller your photo will need to be printed. For example, images are compressed for the internet at 72 dpi. Typically, the largest you can go with this type of file is 4×6/5×7 without it becoming pixelated. Photos from the internet are not meant to be printed, only displayed on monitors. The optimal setting for printing a photo would be 300 DPI/PPI.
So how do you know how many dots your photo has?
If you are on a PC – right click on your photo. Click on Properties. A new box will pop up, click on Details. There you’ll see the DPI.
If you’re on a MAC – hold Apple + i (or command + i). This should pull up an info box.
Now that you know the basics, we can manually resize it or left some software do it for us. We turn to the experts to help us get the best print.
Let’s turn to the Photoshop King himself, Scott Kelby. I found THIS ARTICLE by him years ago and I still use this method to this day in Adobe Photoshop. It has never failed me. Here are the hi-lights from the article. This is for original files with a dpi of 300, this will not work for images taken from the web.
Open the photo you want to resize, then go under the Image menu and choose Image Size.
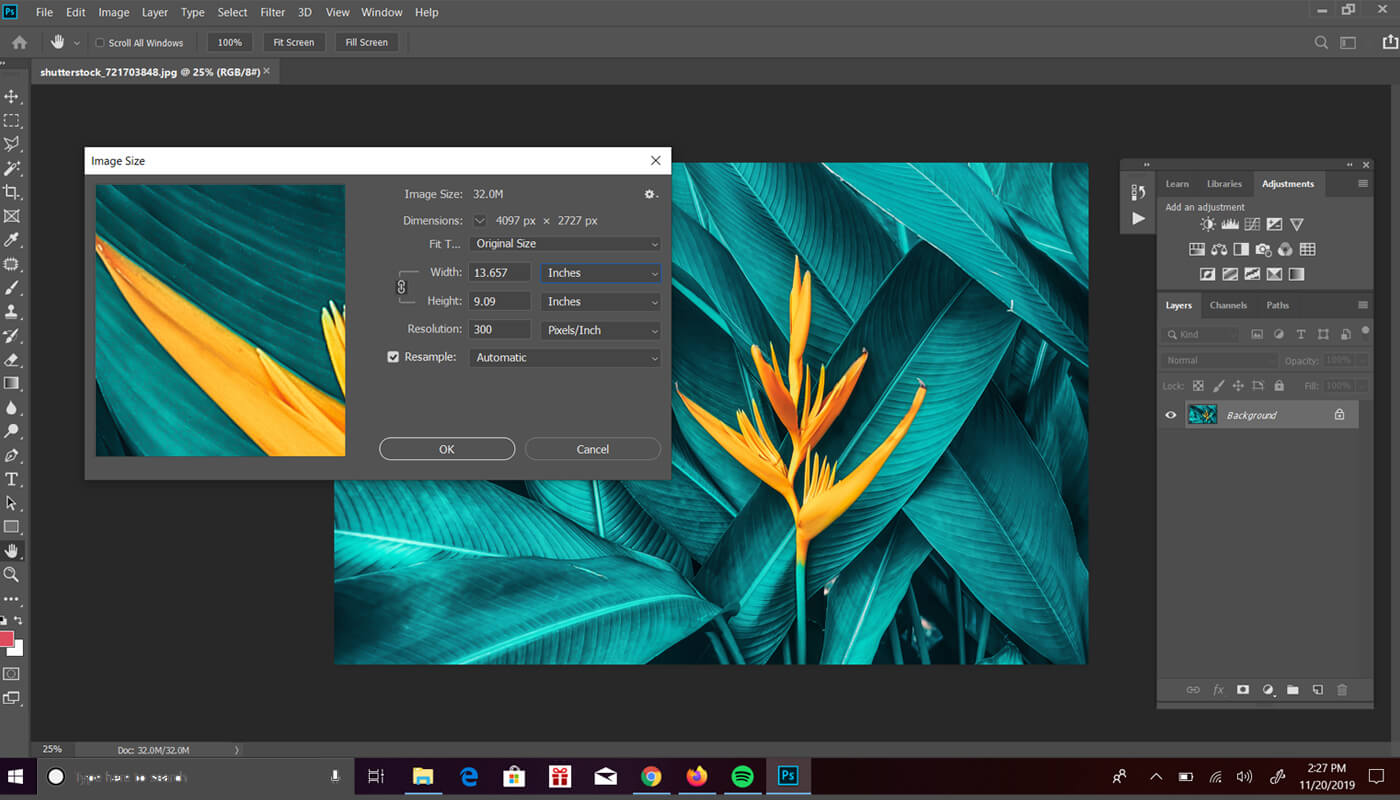
Type in the dimensions you want as your final print size.
“Once your size is in place, you’ll need to adjust your resolution upward, so go to the Resolution field and enter 360. Now, you know and I know that this goes against every tried-and-true rule of resolution, and breaks the never-just-type-in-a-higher-number-with-the-Resample-Image-checkbox-turned-on rule that we all live and die by, but stick with me on this one—you’ve got to try it to believe it. ” – Kelby
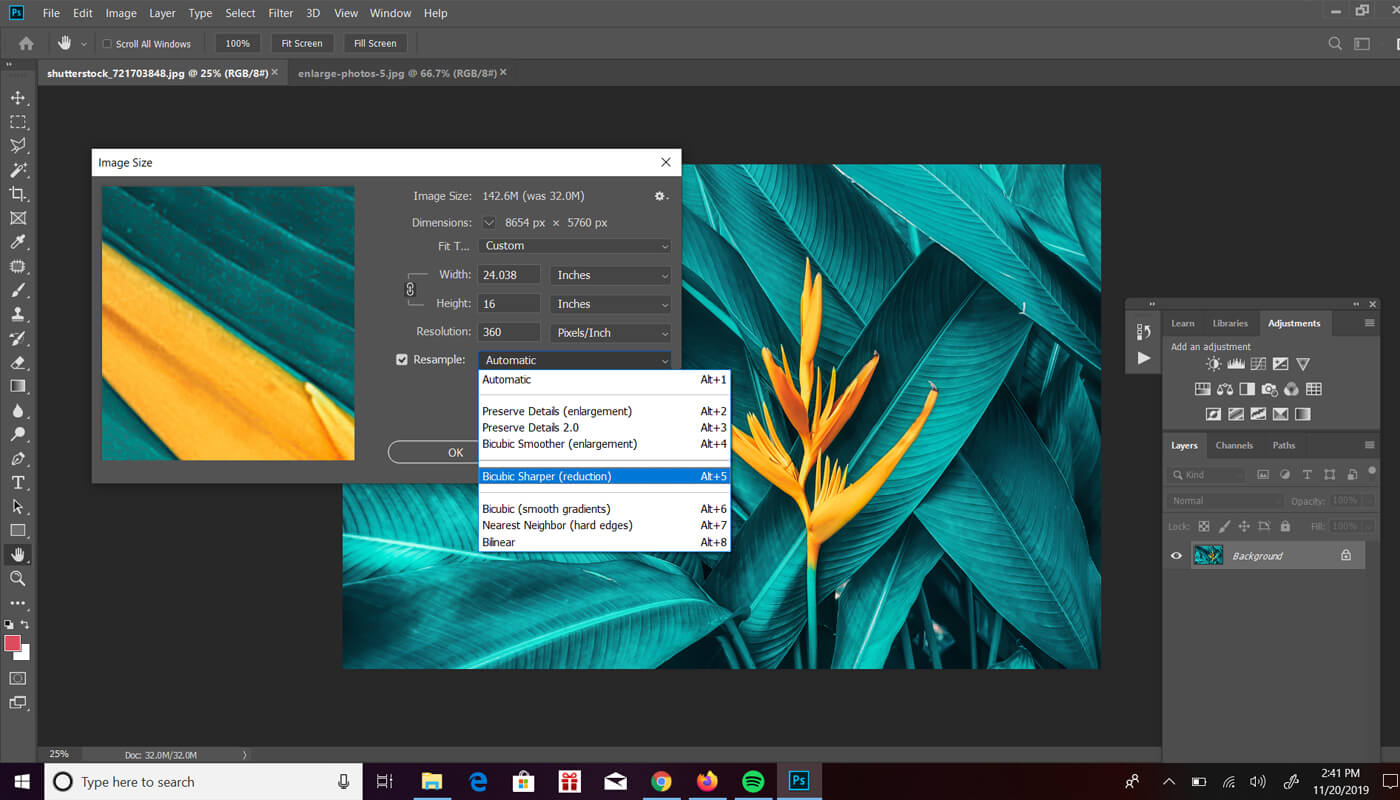
“The key to this resizing technique is to not use the sampling method Adobe recommends (which is Bicubic Smoother), and instead to choose Bicubic Sharper in the Resample Image pop-up menu, which actually provides better results.” – Kelby

Save and print your larger image with Printique. You can start HERE.
Still too much math? Ok, we get it. We found this ARTICLE by Craig Hull for Expert Photography. While he gives a number of great pointers, there is one tip that is great for those that don’t use PhotoShop or LightRoom.
Craig suggests for Windows users to try A Sharper Scaling. It’s free and shows examples right on its website. This isn’t the only software available for resizing.

“There isn’t a dedicated software for mac, but Waifu2x offers a strong option. There is also the simple Image Enlarger. I also heard good things about Let’s Enhance. Basically, as these programs have one job, they do it well. They ‘guess’ much better than other programs, and create sharper images when resized.” – Craig Hull
So, there are a number of different ways you can enlarge your photos, while retaining detail and quality. Depending on how comfortable you are with files you can manually do it yourself or leave it the software to do it for you. Or you may want to add extra steps, such as sharpening files.
At some point, you will probably need to upsize your image whether it’s for your business or for your home. While these two different methods will help you upsize your photo, you’ll still need to keep in mind you’ll need a solid photo to begin. If you’re shooting jpeg, make sure it’s on the highest setting. Also, reduce your noise by trying to keep the ISO low. Of course, making sure your image is tack sharp will also make a drastic difference.
However, you decide to enlarge your file, know that Printique offers Silver Halide photo printing. Silver Halide printing offers the sharpest and most vibrant rendition of digital files. If you’re ready to find out more about this type of printing, click HERE.
 Facebook
 Twitter
 LinkedIn
 Email
Email