0
Black and White Portraiture is and always will be timeless. I recently came upon an article on Fstoppers about Black and White portraiture from John Schell, a lifestyle photographer based in San Diego, California. His images were breathtaking and his advice insightful. I asked John if he could share his knowledge with our members.
Here is John’s 5 tips.
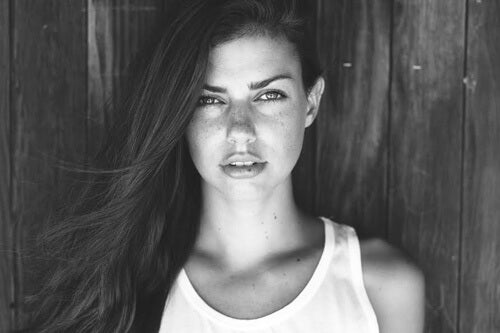
There is an old quote which states, “if you want to shoot fashion, shoot in color, but if you want to shoot emotion, shoot in black and white.” I don’t know who first said it, but I tend to agree. I do love myself a good black and white portrait. There is something special about black and white imagery which has the ability to cut through all the baggage and display both the inner beauty and turmoil which can be so easily hidden away by color photography.
That’s not to say emotion and/or mood cannot be captured with a color photograph. Given the chance, however, when looking at two portraits side by side, nine times out of ten, the black and white portrait will hit me in a place where the color photograph just cannot reach.
When I first started shooting fashion, I was all about color and pop. The work I followed was very representative of the outdoor strobed look; vibrant, bright colors, deep skin tones, and an unlimited depth of field all set against deep blue skies. It’s an almost timeless, classic style and one that I believe, when done properly, is more a work of art than a simple photograph. My attempts to emulate (copy) it fell short and, despite my best efforts, I eventually decided to put my strobes away and piece by piece, sold all of my Stobist equipment.
In shooting natural light, I discovered, somewhat by accident, a love of black and white portraiture. These are my basics.
Step One: My Optimal Setup
What is needed almost more than anything is to find a location where your subject’s face is brightly lit, and the falloff of light starting about the ears or back of the head is pretty abrupt. What works best for me when shooting natural light portraits is to place the subject in an area of open shade, trying to find a place where they are surrounded on at least three sides. Place your subject in the shade and as close to the line of light as possible. (see diagram) Bonus point are given if you can find a place where your subject is in the shade, you are standing in the sunlight, and there is something large and reflective immediately behind you like a building or a light colored fence.

Step Two: Shoot the Eyes
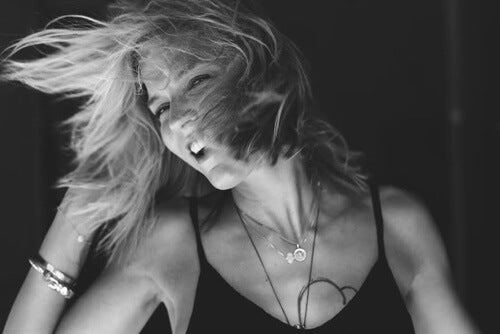
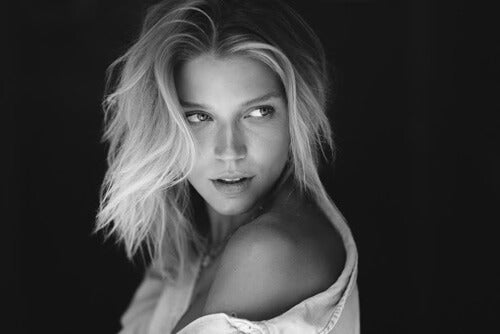
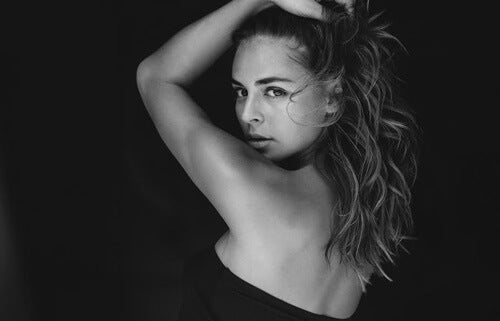
The key to a successful portrait is, in my opinion, the subject’s eyes. Deep and meaningful, fun and playful, dark and mysterious, no matter what the mood,in the eyes is where you will find it. This why, I feel that regardless of what you’re trying to capture in your portrait session, even if the intent is to keep them closed, I always aim for my subject’s eyes.
Step Three: Camera Settings
My camera settings are simple. Using a fast lens, I try to shoot as close to wide open as possible – usually an aperture of somewhere between f/1.4 and f/2.2, maybe f/3.2 if the situation calls for it. Shutter speed is set to the situation and ISO is usually locked in on 400 or so.
Step Four: Model Posing
This part is really simple. Like I said earlier, if want to capture outstanding images of anyone, a great place to start is with the eyes. Focus on the eyes, make sure they are sharp. Make sure that if you’re using a shallow depth of field, that at least the rest of the subjects face be in focus. Posing should be natural, moody. Ask your subject questions. Ask them to move. Ask them to think about a time when they were happiest or when they were saddest. Ask them to think about their favorite person, or someone whom they cannot stand. The connection between you and your subject is key. In addition, there really shouldn’t be any distractions within the frame. If you are taking a portrait, take a portrait – nothing else.
Step Five: Post Processing
As I said earlier about the technical aspects of the camera, the same can be said for the post processing aspects. I am constantly learning new things and discovering my own way of doing things. As such, I am certain there are retouchers who will tell me that what I am doing is wrong, wrong, wrong. And they’re probably (definitely) right. I’m not going to get into any of that. My post processing is fairly simple; adjust exposure, convert to black and white, deepen the blacks and/or shadows via a tone curve (or sliders in Lightroom), perhaps add a bit of a fade, and then sharpen. After that (or before, whichever) you can retouch away any blemishes, even out any skin discolorations, and you’re good to go. If you want take it a few steps further, you could dodge and burn the image to make it really pop. The key here is to get most of it right in camera.
Conclusion:
The overall goal here is not to make something so technically perfect that it becomes a workshop in itself or a tribute to your technical ability. You want to capture mood, the drama, and the emotion. The eyes of your subject will tell a story; your job as a portrait photographer is to remove any obstacles which may prevent them from doing so.

John Schell is a Southern California based lifestyle and commercial photographer and staff writer for Fstoppers.com. In addition to his photography work, he is also a social media consultant, an educator, and an avid (and unashamed) Instagrammer.
You can follow his artwork through these channels:
 Facebook
 Twitter
 LinkedIn
 Email
Email